Connecting the Mac to the Pi

The main hurdle I’ve had with the Raspberry Pi is simply seeing the screen:  Since I don’t have  a spare monitor laying around, it’s plugged in over HDMI to my livingroom TV.  Sitting on my couch,… the text is really small.

Thanks to the awesome people at Adafruit Learning Systems, they’ve provided two tutorials specifically for logging into your Pi remotely over SSH (Secure SHell), and remote-controlling the desktop via VNC (Virtual Network Computing).  This gives you the advantage of not needing a spare monitor, keyboard & mouse to control the Pi:  You can use your current PC’s setup.

I don’t know anything about Linux or sysadmin work, but their tutorials worked exactly as shown and I was connected in no time.  I’m posting this mainly as a reminder to myself how I got all this stuff hooked up…

  • First, you need to get a SSH connection from your computer (in my case, Macbook Air) to the Pi:  Adafruit’s Raspberry Pi Lesson 6: Using SSH shows you how.  Once this is setup, you can easily remotely login from a Terminal on your PC, and take control of the Pi.  But you don’t have access to it’s gui system, only the command-line.
  • Second, to control the Pi’s gui, you need to install a VNC server on the Pi, and a client on your PC (Adafruit recomends RealVNC’s ‘VNC Viewer’).  Their tutorial covers all of this: Adafruit’s Raspberry Pi Lesson 7: Remote Control with VNC.

Once all that software is installed\setup\configured, how do you make the connection?

  • Boot the Pi, wait for it to ‘be ready’.
  • Open a terminal on your PC:  SSH into the pi (put in appropriate ifnet address of the Pi and login name):
    • ssh 192.168.2.97 -l myPiLogin
  • The terminal is now controlling the Pi.
  • Next, start the VNC server on the Pi:
    • vncserver :1
  • Now that you have a SSH connection to the Pi, and the VNC server running on the Pi, you can connect via VNC Viewer on your PC:
  • Open the VNC Viewer app, and connect to the pre-configured server you made earlier:   For example, 192.168.2.97:1
  • After entering in the password, the Pi’s desktop should spring to existence on your PC.
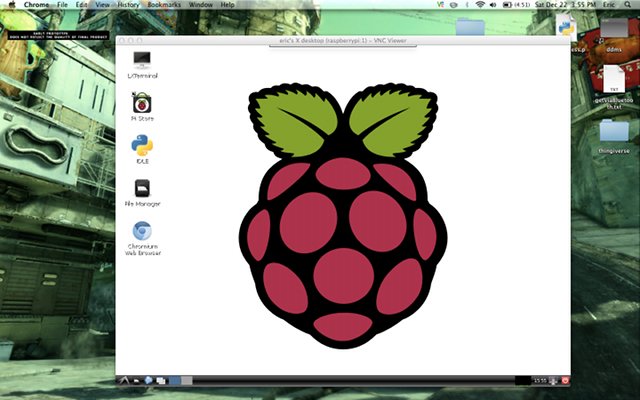
If you forget the address of your Pi, you can run ifconfig from the pi itself (which of couse means hooking it back up to a monitor\keyboard) to get it.
Programming Python on the Pi will be so much easier now…

Pi's desktop on my Mac's desktop: Success!


Raspberry Pi

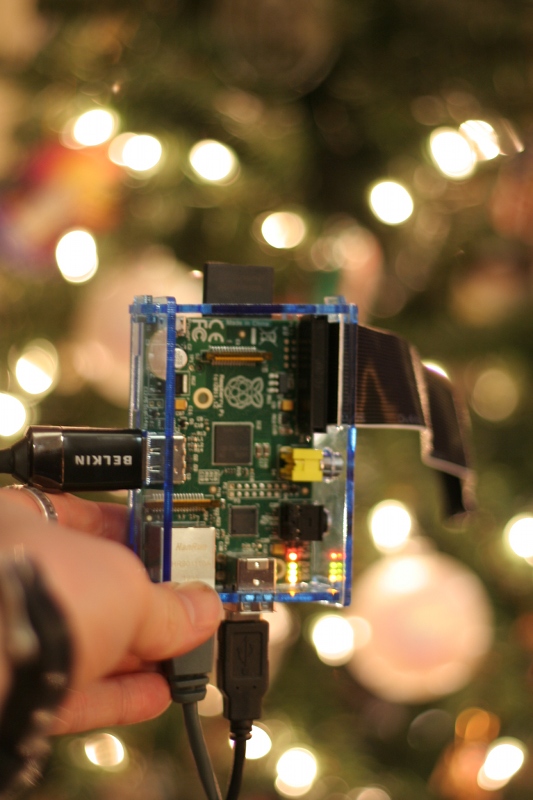
I was lucky enough for my birthday to get not one, but two Raspberry Pi‘s (model B).  And since it’s holiday time, I thought it worked well with the Christmas tree:

Here you can see the Pi with it’s “Maker Pi” box, HDMI, Ethernet, USB, SD, and GPIO all connected.

In addition, the gifts came with:

Upon arrival I got the USB cards flashed with the Raspian “Wheezy” Linux distro (something I’d never done), got myself setup with a custom Linux login (something I’d never done), installed the Python GPIO library, and even got Chromium installed as the web browser.  I had to buy a powered USB hub, and through that hooked up a wireless keyboard and mouse (the Pi powers itself over the usb directly).  I have no spare monitor, so right now it’s hooked up to my main LED flatscreen in the living-room over HDMI:  The text is so small… and so far away….  I recently just soldered up the Adafruit Pi Cobbler which will let me interface its GPIO pins with a breadboard.  And shortly I hope to make some LED’s blink.

It’s nice to be back on the command-line again… reminds me of my DOS days (and the Apple ][ before that), and Linux is turning out to not be as scary as I thought it would be.  And it doesn’t hurt that my neighbor is IT 😉  It will be interesting to see how this compares to the Arduino, already I’m learning that the Pi is 3.3v compared to the Arduino’s 5v, it has no ADC, nor realtime clock.  All things that can be purchased separately.  But I’m excited to see what it can do.

Here’s a few other interesting links I’ve ran across:

Sad Replicator, Happy Replicator

Last weekend I printed out this Makerbot Snowman for a ‘secret-Santa’ gift exchange:

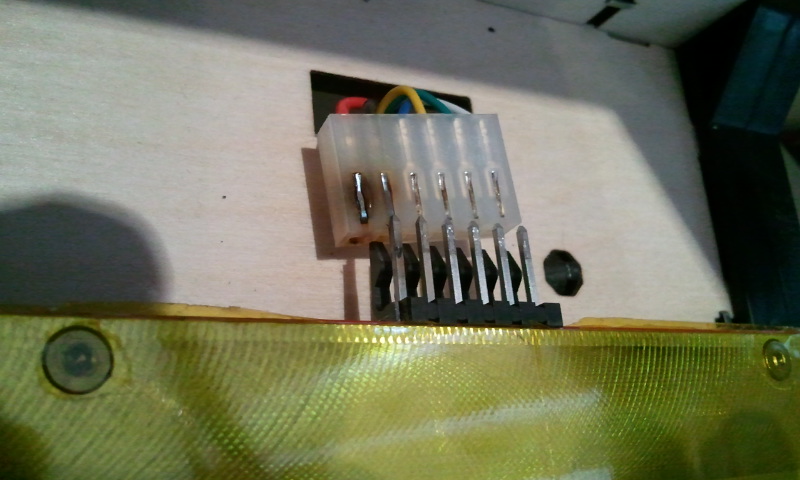
All together took around 7 hours.  The next day I went to do another print.  But something was wrong.  The Heated Build Platform wasn’t ‘heating’… it was stuck on 14 degs.  Upon closer inspection I saw this:

(it was plugged in at the time, un-plugged for drama)

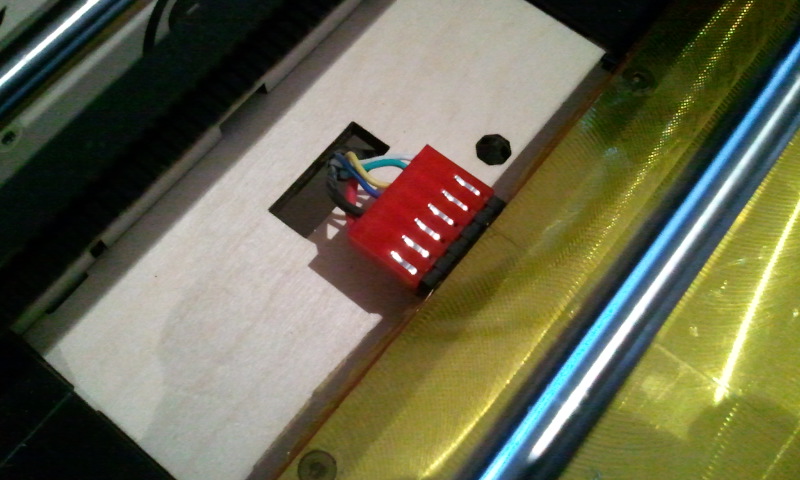
Fried.  Contacted Makerbot tech-support, and 5 days later I had a new wire & connector in-hand, no charge.  Plugged it all together:

And now it’s happily printing again.  It’s probably hard to tell from the pics, but the positive and negative leads on the new connector are a larger gauge:  Support said that the newer models ship with the larger wires, presumably because of these issues.


Weekend Project: Man-Cave Workbench

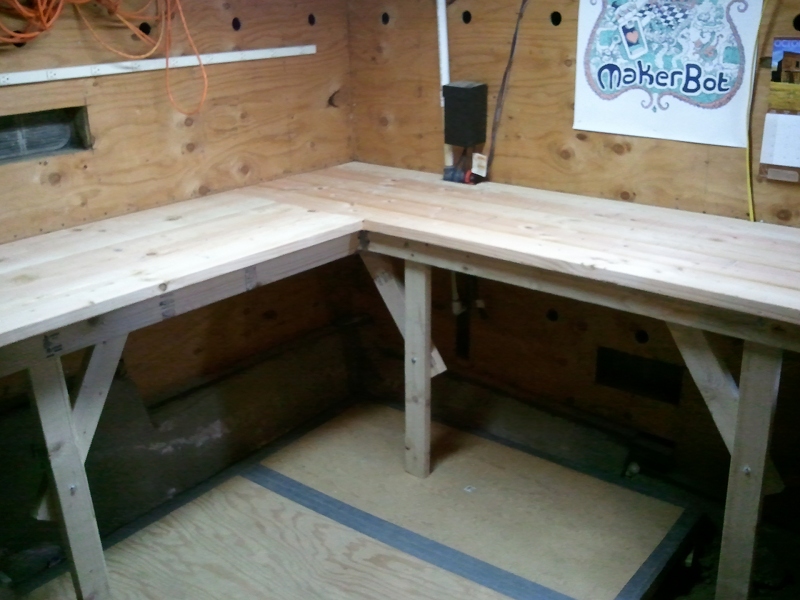
The dirt-floored underside of my small house is storage\my workshop (aka Man-cave).  It came with a single 2’x5′ workbench… but I really needed some more space for non-digital projects.  After clearing out a corner and leveling an old queen-sized plywood\2×4 box-spring (my father had assembled) on some bricks, I was ready to fabricate the new workbench.

For strength, I mounted it directly to the shear walls (installed for earthquake proofing here in CA).  The top is all 2×6’s, and the frame\legs are all 2×4’s.  Bought all the joist hangers, wood, screws & bolts from Home Depot, the whole thing came together over the course of a weekend for about $90,  not too bad.  And now I have a workbench built like a tank.

Phase 1: 2x4's screwed to shear walls, ribs on the floor with joist hangers attached.

Phase 2: Framing in-progress...

Phase 3: Framing complete, legs bolted together.

Phase 4: Complete!

Latest 3d print: Botmobile

I thought it would be a good experiment to try 3d printing something ‘more complex’ on my Replicator:  Enter the “Botmobile”

First off, some pics!

Here’s all the 3d parts printed out, plus the electronics kit… which is no longer available in the Makerbot Store:  I talked with Makerbot support, they’ve discontinued it :-(

And here’s the finished thing:

It was quite a process to get everything printed out, but overall, really enjoyable and I didn’t encounter any problems.  I printed everything out in black ABS, and then spray-painted the body and wheels cherry-red (same as the previous bowl I printed).  The assembly went off without a hitch, and other than having to slightly adjust the front steering servo, it started driving right away.  Overall, I wouldn’t call it a ‘high performance’ RC vehicle:  Already the gearbox is starting to strip (and I can’t figure out why, it seemed pretty tight when assembled), and the front wheels hit the battery-box when turning sharp (underneath, in the middle) if you don’t trim it right.   But it does drive around and steer, so mission accomplished there.

Everyone’s been asking how long it took to print.  I’ve had little luck successfully using the ‘accelerated’ setting on my Replicator, so it’s all been ‘standard print times’.  There were multiple files to print, here’s the time estimates for each:

  • Windshield: 1h 7 min
  • Rear Axel: 1h 34 min
  • Back half of body: 4h 51 min
  • Front half of body: 5h 22 min
  • Gearbox: 2h 21 min
  • Interior seats: 2h 57 min
  • Front steering assembly: 1h 44 min
  • Wheels (all four): 8h 41 min

So that adds up to 28 hours 37 minutes.  It didn’t seem that long though:  Most of the long prints I did overnight:  I hooked up the printer to my a light timer (the type you plug your lights into when you go on vacation so you can turn them on\off at a certain time), and would set it to auto-turn off the printer about half hour after the print should finished.  Worked perfectly every time, didn’t have any misprints.

As of the time I printed it, I’m one of four people who have ‘made it’ on Thingiverse.  So it’s a unique feeling to know that… not many people on the planet have a 3d-printed RC car.  Here’s a few more pics: