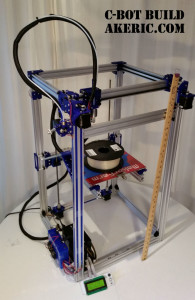
C-Bot 3D Printer
This page tracks the series of blog posts I made while building the “C-Bot” 3d printer, and any related posts after.
- Resource Page: This page is a collection of resource for building my Core-XY C-Bot printer: Electronics, hardware, software related.
Build Progress:
- Part 1 : Overview
- Part 2 : Extruder Assembly
- Part 3 : Power Supply Modification
- Part 4 : Cutting the linear rail
- Part 5 : Printing the parts
- Part 6 : Tapping the linear rail
- Part 7 : Organizing the hardware
- Part 8 : Assembly Day 1 : Bottom of the frame
- Part 9 : Assembly Day 2 : Top of the frame
- Part 10 : Assembly Day 3 & 4 : Z-build platform
- Part 11 : Assembly Day 5 : Y-gantry & X-slider/hotend
- Part 12 : Assembly Day 6 : HBP install, and near final hardware assembly
- Part 13 : Assembly Day 7 : Belts & dampers installed, hardware complete!
- Part 14 : Electronics Day 1 : Wires mocked up & connected to Rumba, stepper drivers tuned.
- Part 15 : Software Day 1 : Install Marlin, manually tune motor stepper drivers.
- Part 16 : Assembly Updates : Replacing metal corners, z-bracket screws, researching z-stepper issue.
- Part 17 : Electronics & Software day 2: Hook up dual z-stepper drivers, configure Marlin, wire up endstops.
- Part 18 : Software Day 3 : Tuning movement settings.
- Part 19 : First Print!
- Part 20 : Electronics Day 3 : Swapping the A4988 stepper drivers for DRV8825’s
- Part 21 : Software Day 4 : PID Autotune + Start & End G-Code
- Part 22: Final wiring, near final bot
- Part 23 : Filament Cooling Fan install
- Part 24 : Tuning print settings for the Volcano
- Part 25 : Catastrophic Failure
- Part 26 : First ‘big’ print
- Part 27 : First ‘really big’ print
Post-build, and upgrades:
- More big vases on the C-Bot
- Hex Shelf Concept
- Taming the Volcano’s print settings
- Upgrading the cooling fans
- 3DBenchy vs the Volcano
- New 3D Print: Giant ‘P’
- Part 28 : Lighting, Ringing, Breaking
- New 3D Print : Mini-Me
- New 3D Print : Life-Sized Pirate Head
- Part 29: Rearranging the Leadscrews
- Part 30: Switching from Bowden to Direct Drive
- New 3D Print: Eiffel Tower
- New 3D Print: Reindeer!
- “I am (calibration) Groot”
- Supercharge the Volcano (aka, get it to heat properly)
- Part 31 : Upgrade to RADDS, Repetier
- Tuning Jerk values in Repetier
- Part 32 : New Cooling Fan Shroud, low-profile bulldog clips.
- Part 33 : Machining a mic6 aluminum build plate
- Part 34 : Installing RepRap Firmware on RADDS
- Part 35 : Updating the heated bed controller
- New 3D Print: Millennium Falcon
- Part 36 : Adding an inductive z-probe to RepRap Firmware/RADDS
- Part 37 : 2017 Redux
- Part 38 : PID Autotune on RepRap Firmware, fixing z-artifacts
- Part 39 : Magnetic, removable build plate

No comments yet.