Posts Tagged ‘ tolerance

Visual comparison of 1mm 3d printer nozzle overhang tolerance

Since I’ve been printing with a 1mm E3D-v6 Volcano nozzle on my C-Bot, overhang has become more of an issue than on my Replicator 1: The thicker the layers get, the less overhang you can support.  I could ‘sort of visualize this’ in my head, but I wanted to get it down on paper where it truly makes sense.

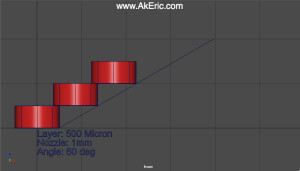
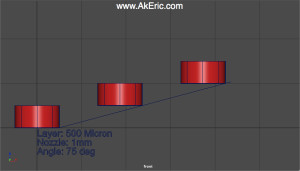
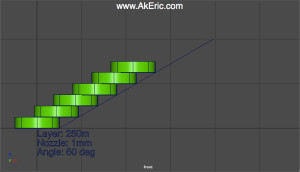
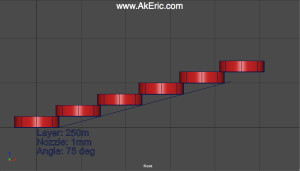
I mocked up nozzle diameter, layer thickness, and print/overhang angle in Maya, below are the results.  Very quickly you can see how the thinner your layers are, the better overall overhang you can support.  I did this presuming only one shell was being used.  Using two shells would support better overhang, since the outer layer would have the inner one to stick to.

1mm nozzle, 500 micron layer height:
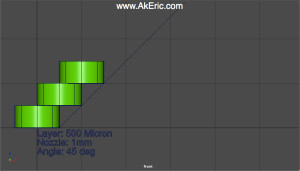
lay500_nozzle1mm_angle45  Success with one or two shells.

lay500_nozzle1mm_angle60Fail with one shell, possible success with two shells.

lay500_nozzle1mm_angle75  Fail with one or two shells.

1mm nozzle, 250 micron layer height:
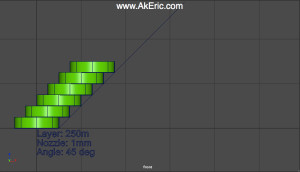
lay250_nozzle1mm_angle45 Success with one or two shells.

lay250_nozzle1mm_angle60 Success with one or two shells.

lay250_nozzle1mm_angle75 Fail with one shell, possible success with two shells.

Small-scale 3D print tolerances

I picked up some small but powerful cylindrical magnets, 8mm diameter by 3mm tall, to incorporate into a new multi-part 3d print:  They’ll help hold the whole thing together.  I print mainly in PLA, and while it shrinks less than ABS, it still shrinks, so I needed to make sure that the cylindrical holes I design in my 3d model will actually allow the magnets to fit, based on how my Makerbot Replicator (1) prints things.

Using my micrometer, I checked the size of the magnets:  They were within a few hundredths of a mm of their spec:  Negligible change.

I designed & printed a simple rectangular volume to place my test holes:  It measured 60x30x3 mm.  In it I placed three different holes with diameters of 7.5, 8.0, and 8.5 mm.  For the record its print specs are:  300 micron layer resolution, 2 shells, 10% infill, blue PLA extruded @ 220 deg, HBP off, on blue painters tape.  My print nozzle is .4mm.  Took about 12 minutes, and was firmly affixed to the build platform before removal with no curling.

You can see the results below:

cylTolTest01

So what were the results?  Checking with my micrometer….

  • The outer dimensions of the printed rectangular volume were very close to the 3d model:  .1 mm larger (or less) on X, Y, & Z.
  • The printed cylindrical holes were each nearly exactly .5mm smaller from the 3d model:  As you can see from the above image, the modeled 7.5mm hole ended up being printed @ 7.0 mm, the 8.0 hole @ 7.5mm, and the 8.5mm hole @ 8.0 mm.
  • Because of this, the 8mm wide magnet fits snugly into the 8.5mm modeled hole, which ended up printing with a 8.0mm diameter.
  • Another interesting side effect:  Even though the rectangular volume and magnet were both 3mm high, and the magnet fit in the whole snugly but easily, I was unable to push it all the way through without some force:  I believe this is because the first few layers probably ‘squish out’ more on the build platform, causing a slight lip to form on the bottom edge.  Nothing a drill or file (or obsessive-compulsive magnet pushing) couldn’t fix though.

So this raises the question:  Why does the outer-volume of the rectangle match the 3d model within .1 mm larger, but the interior cylinders are all .5 mm smaller?