Visual comparison of ballnose stepover values on the X-Carve
I built my X-Carve back in December: It’s been a great new tool to learn. I’m still very new to the world of CNC, and like to visually grasp the concepts. So I decided to do a series of tests to understand how ‘stepover’ values effect the finish-pass quality of the surface both on X, and on the XY axes.
The MeshCAM blog does a great job of describing the fundamentals of stepover here.
Here are the stats for the cuts:
- Hardware: Inventables 1000mm X-Carve.
- 1/4″ ballnose bit, 2-flute upcut.
- Feedrate 60ipm, DeWalt set 1 to 2.
- Wood type: Unknown (came from an old bookshelf bottom), but if I had to take a guess, I’d say pine.
- 3d Design Software: Autodesk Maya
- CAM: MeshCAM
- Sender: Chilipeppr
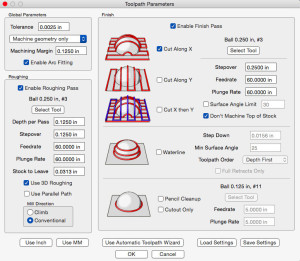
The specifics from MeshCAM below. All values for all cuts were the same except of the stepover, and either “Cut along X”, or “Cut X then Y”.
I wanted really extreme examples, so I set the following stepover percentages for my test: 100% (1/4″), 75%, 50%, 25%, 10%, 5% (only done on X, not XY).
I started by designing a model in Maya that incorporates a variety of surface angles. The inside volume is just over 2×2″, by about 1/4″ deep.
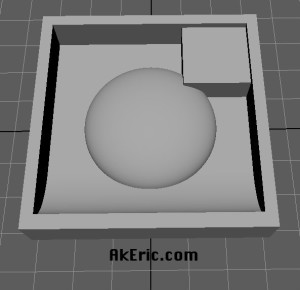 (that’s a flattened sphere in the middle)
I then made multiple different gcode (nc) via MeshCAM, and started cutting them.
The whole piece for the X-cut:
And the whole piece for the XY cut:
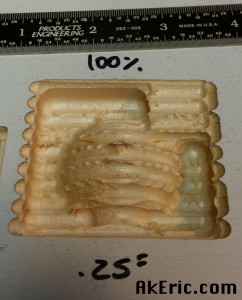
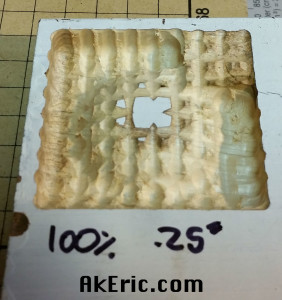
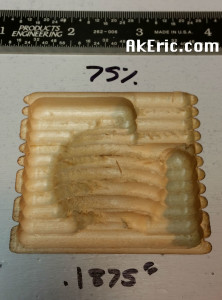
Individual close-ups below. X pass on the left, XY on the right.
Note the rough-cut for all pieces took just about exactly 2 minutes. All the times listed below are for the X & XY-Axis Finish pass in min:sec. So to get the total cut time, just add two minutes to the below values.
- 100% stepover, .25″ : This is obviously super rough. I honestly expected the segment to be closer together.
- X Finish Pass Time: 0:47
- XY Finish Pass Time : 1:34
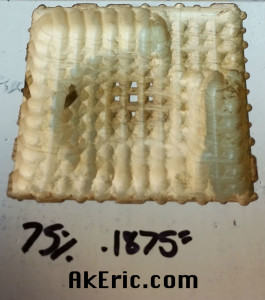
- 75% stepover, .1875″ : Not too much different than 100 really.
- X Finish Pass time : 1:03
- XY Finish Pass time : 2:03
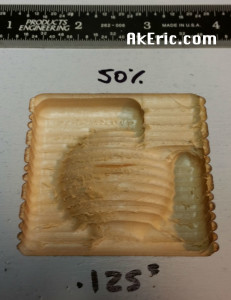
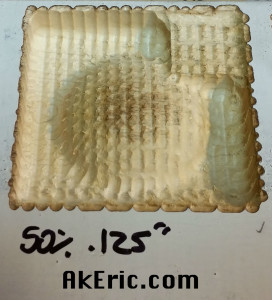
- 50% stepover, .125″ : Still really rough, but arguably could do something artistic with the ridges at this point.
- X Finish Pass time: 1:30
- XY Finish Pass time : 3:00
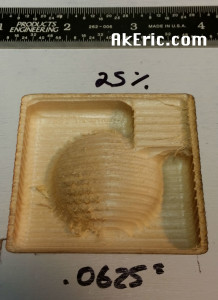
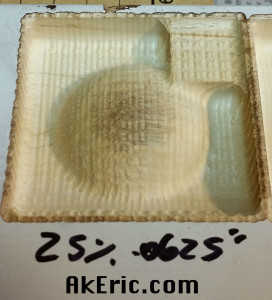
- 25% stepover, .0625″ : Carry on, nothing to see here. Even with the XY pass, it’s still pretty rough.
- X Finish Pass time: 2:50
- XY Finish Pass time : 6:40
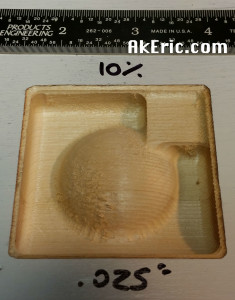
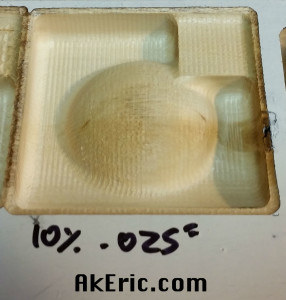
- 10 % stepover, .025″ : Now we’re getting somewhere: Ridges are still visible, but small. Pretty smooth to the touch, but you can still make them out. Sanding could take care of this.
- X Finish Pass time: 7:10
- XY Finish Pass time : 14:00
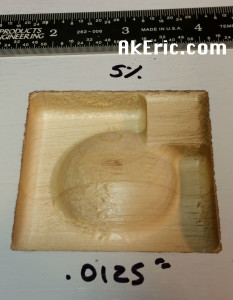
- 5% stepover, .0125″ : Done. Finished. Can’t make out the ridges with the naked eye. Very smooth to the touch. No sanding needed really.
- X Finish Pass time: 14:20
- No XY pass done. Not much point considering the quality already achieved.
Final thoughts:
- Notice on all X-cuts that the lower-left section of the hemisphere is rough. Must have to do with the direction of the toolhead (left<>right on X) and the spinning of the bit (clockwise). The XY cuts removed these issues.
- If you are ok with sanding, 10%/.025 stepover is ok. If you want to avoid sanding entirely, go with the 5%/.0125″ stepover.
- Even though the 5% X-only stepover and 10% XY stepover took the same amount of time, the X-only has a far better surface quality. You’d still need to sand the 10% XY one.
- What do I take away the XY Finish pass? The XY Finish Pass times are generally 2x the X-only times, but don’t really increase the quality. Not much point unless you’re looking for ‘that look’ in the cuts.
- I feel like the speeds could be greatly increased on the finish pass: I was only running the router on speed 1 to 2. The smaller the stepover, the smaller the amount of material you’re removing, so arguably the faster the toolhead could move to compensate for this under load: There’s a lot of speed left in the router…. sounds like another good test to try.
