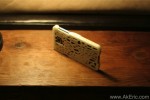
Designing a 3d printed smartphone case
I recently picked up a new Samsung Galaxy S5, and needed a case for it. I’d previously printed cases for my wife’s iPhone (here) based on a Thingiverse app. But there were no apps I could find for the S5, so I decided to make a case myself. Below I discuss at a high level the steps I went through.
Decide the authoring software
While I’m intimately familiar with Autodesk Maya, it’s not really geared towards highly-accurate solid modeling. Considering I wanted to do this on the cheap, that limited me software-wise. My main choices were Autodesk 123D Design, and Autodesk Fusion 360 (suggestions from anyone else?). While 123D Design could probably do it, I really liked Fusion 360’s timeline based workflow/history, and overall it is a much more powerful tool (but costs $ if you want to use longer than a month).
Specific things I learned about Fusion 360 on the Mac:
- FYI I’m still very new to the software, so it’s quite possible I could be missing something when it comes to my below presumptions.
- The ‘Sketch -> Project/Include’ menu is confusing. But it’s where you go if you want to either project curves onto a surface, or when authoring a new sketch include 3d geometry to use as reference. The docs on it are greatly lacking.
- If you want to include a surface as reference, select the surface, then access that menu: It will create a new sketch with the surface as reference.
- If you want to project an existing sketch onto another surface, it looks like there’s a bug on the mac. I discuss the bug, and the solution on the forums here.
- It’s better to add features via the Modify & Create menus than the Sketch menu: Modify & Create features are added as history to the timeline, while making changes to a sketch aren’t recorded in history. For example, if you need to apply a fillet, you can fillet a sketch (which is then extruded into a surface), or you can fillet the surface after extrusion. Filleting the surface (rather than the sketch) seems to be a better call if you later want to change the fillet values.
- I had a hard time figuring out how to accurately place sketches relative to ‘something else’ (like placing a circle exactly 17mm away from an edge). It appears the workflow goes: Make your sketch ‘somewhere’. Then, using the ‘Sketch -> Sketch Dimensions’ tool, create relationships between your sketch and the ‘something else’ based on distance.
- Running it on a Macbook Air probably isn’t the best choice: Not very responsive, pretty chuggy.
Find a starting point
I first downloaded and printed this design from Thingiverse. In fact my original plan was to print that case and be done with it. But that case has a large clip that rubs right against my ear, and got painful on any call over 30 seconds. That is really what prompted me to design my own. While I could have used that case as a starting point, I wanted this design to be ‘all my own’, so my usage of it stopped there.
To get started I simply traced the phone on graph paper, then using my calipers measured all applicable distances for buttons and doodads:
This gave me what I needed to begin authoring in the software.
Iterate on design
It’s crazy to think that what I’m effectively doing is iterative product design. The ability for me to model something in 3d, and have a printed version an hour and a half later (for about 1$) is just amazing. Over the course of several days I slowly refined my design, print after print. Some days I’d iterate and print 3 designs. Here’s the evolution:
From left to right:
- 01 : My first attempt. Had clips to hold the phone in on the top corners, and the bottom by the plug. Failed not being deep enough, and the clips required print supports that weren’t generated, so their undersides bowed down blocking the phone.
- 02 (not pictured, never printed) : Trying to fix 01. Realized the way I modeled in prevented me from modifying it in a procedural way (still learning best practices of the software). Whole design scrapped.
- 03a : Complete re-design. Before I modeled the case, I modeled the phone to spec. This allowed me to compare the 3d phone to the 3d case to make sure everything lined up. 03a had no top clips: It’s just the base, sides, and required holes. I wanted to make sure I had designed something that would fit the phone before I put any more effort into the details. Note I made the case half a mm taller and wider than the phone, and it seemed to fit perfectly.
- 03b : Creation of top clips to hold the phone in. These are simple cubes on the top L/R and bottom L/R sides. While the phone fit and clipped in, the clips themselves required support material which was hard to remove.
- 03c: New clip design that added a chamfer under them to provide print support, and on top to ‘soften’ them so they wouldn’t hook things, like my pocket. Unfortunately the chamfer hit the top of the phone, and it didn’t fit well. Also added rounding to the sides where they come close to buttons, to allow more room for fingers.
- 03d: Changed clip design again: Raised the under-chamfer up: Phone fits well! But after using it for a day I found two more problems: The top left clip (by volume control) was small and would get hooked on my jeans (and eventually started to split the case apart) since it was so square and sharp on one side. In addition, even though there was plenty of clearance for my fingers from the top, the base of the case was actually in the way when trying to push the side buttons: The base needed cut out near the buttons.
- 03e (white case) : I went ahead and arted this one up thinking it’d be the final design, but not quite: I added notches in the base at the volume, power, and usb port: Much better finger clearance now. Added in my logo as embossed text on the left side. I again completely redesigned the clip on the left side: Rather than the two on the top\bottom left, I made a single larger one in the middle left: No longer catches on my pants. But human trials revealed one last problem: I never applied a fillet to any edges of the frame. All the new “notched in” sections actually had quite sharp corners.
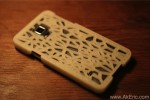
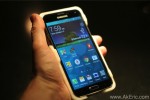
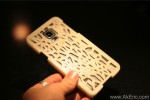
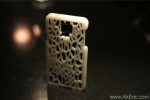
- 03f (final case, shown on top of post) : Applied a nice fillet to all exposed edges rounding them off, and making less pointy. Arted up thanks to the Voronoi tool and a quick boolean in Tinkercad.
Here’s a shot of the final design in Fusion 360 before art/print:
And in Tinkercad, adding the Voronoi boolean:
Final version was printed (about 2.5 hours) on my Makerbot Replicator 1 with these settings:
- Natural PLA extruded @ 230 deg c.
- Removable glass build platform covered with glue-stick (first time trying it, works great!). Heated platform off.
- 200 micron, 2 shells, 15% infill, no supports, no raft.
- Final weight, 30g. Which works out to about $1.05 of material.
Really enjoyable, fulfilling experience to know I have a completely custom, one-of-a-kind case I designed from start to finish.
Purchase:
If you have interested in one, I’d be happy to print one for you. Please access my 3D Hub and place an order: They’re $24.21 each, + tax & shipping.
