Posts Tagged ‘ PLA

Building the C-Bot 3D printer: Part 5 : Printing the parts

Jump to C-Bot blog index to see all the posts.
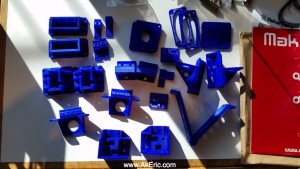

This is really ‘Part 0’, since Mason printed all these parts for me (on my Rep1 he was borrowing) while I was on vacation, before I even started blogging about it.  But it’s worth bringing up the specifics.

Carl Feniak has a full list of the stl’s to download & print over on the C-Bot’s OpenBuilds page.  Mason ended up 3d modeling the entire printer in Maya as a sanity-check for himself, and based on that, made some adjustment to Carl’s files (which my prints are based on).  If Mason posts those updates I’ll be sure to link to them.

I still need to print out a few more things, like the attachment for the E3D Volcano, but otherwise most of the printing is done.

Print settings were:

  • Printed on Makerbot Replicator 1
  • MakerGeeks ‘Maker Filament’ PLA 1.75mm, “Soulful Blue
  • 300 micron layer height, 2 shells (probably should have been 3), 40% infill, 4 ceiling/floors, .4mm nozzle
  • HPB @ 60 (to help them stick\lay flat)
  • Sliced in Simplify 3D
printed_parts

The filament is slightly translucent, and a really nice color blue.


Jump to C-Bot blog index to see all the posts.

Small-scale 3D print tolerances

I picked up some small but powerful cylindrical magnets, 8mm diameter by 3mm tall, to incorporate into a new multi-part 3d print:  They’ll help hold the whole thing together.  I print mainly in PLA, and while it shrinks less than ABS, it still shrinks, so I needed to make sure that the cylindrical holes I design in my 3d model will actually allow the magnets to fit, based on how my Makerbot Replicator (1) prints things.

Using my micrometer, I checked the size of the magnets:  They were within a few hundredths of a mm of their spec:  Negligible change.

I designed & printed a simple rectangular volume to place my test holes:  It measured 60x30x3 mm.  In it I placed three different holes with diameters of 7.5, 8.0, and 8.5 mm.  For the record its print specs are:  300 micron layer resolution, 2 shells, 10% infill, blue PLA extruded @ 220 deg, HBP off, on blue painters tape.  My print nozzle is .4mm.  Took about 12 minutes, and was firmly affixed to the build platform before removal with no curling.

You can see the results below:

cylTolTest01

So what were the results?  Checking with my micrometer….

  • The outer dimensions of the printed rectangular volume were very close to the 3d model:  .1 mm larger (or less) on X, Y, & Z.
  • The printed cylindrical holes were each nearly exactly .5mm smaller from the 3d model:  As you can see from the above image, the modeled 7.5mm hole ended up being printed @ 7.0 mm, the 8.0 hole @ 7.5mm, and the 8.5mm hole @ 8.0 mm.
  • Because of this, the 8mm wide magnet fits snugly into the 8.5mm modeled hole, which ended up printing with a 8.0mm diameter.
  • Another interesting side effect:  Even though the rectangular volume and magnet were both 3mm high, and the magnet fit in the whole snugly but easily, I was unable to push it all the way through without some force:  I believe this is because the first few layers probably ‘squish out’ more on the build platform, causing a slight lip to form on the bottom edge.  Nothing a drill or file (or obsessive-compulsive magnet pushing) couldn’t fix though.

So this raises the question:  Why does the outer-volume of the rectangle match the 3d model within .1 mm larger, but the interior cylinders are all .5 mm smaller?

Printing PLA with the Replicator

I’ve been printing in ABS since receiving my Replicator last year.  Today I finally made the switch over to PLA.  The ‘why’ is mainly to try something new… see how a new medium prints.  But there are other benefits:

  • PLA doesn’t need to have the HBP (heated build platform) heated to 110 deg Celsius like ABS does :  I read it dosen’t need to be heated at all, but many people find success at around 40 deg C.  What this means is the HBP heats a lot faster…. meaning things print faster.
  • You don’t have to affix kapton tape to the HPB:  ABS sticks really well to kapton tape, and that’s why it’s used.  But it’s difficult and time consuming to get the tape applied to the HPB:  PLA can print on ‘blue painters tape‘, which is much more forgiving when being applied to the HBP.
  • PLA is biodegradable:  More ‘green’ than ABS.

First test run successfull, pic below.  Some notes on the process:

  • Extruder temp set to 210 deg C.
  • HBP temp set to 40 deg C.
  • Purged the ABS by ‘loading’ the PLA for 5 minutes straight, per online docs.
  • GCode compiled via ReplicatorG 0040, Replicator firmware 6.2.
  • Used ‘natural’ colored PLA, it’s semi-transparent.

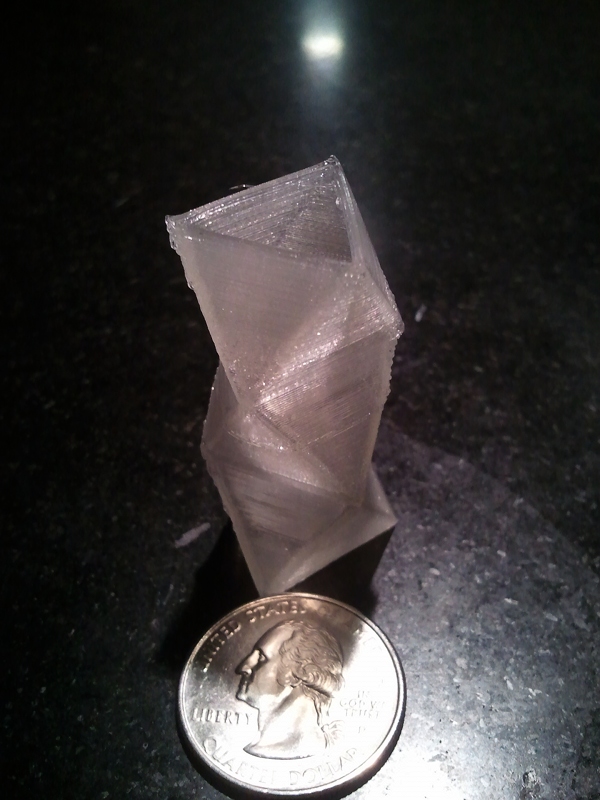
I’m still getting a ‘bug’ where when during the pre-heat, filament ‘leaks’ out of the extruder nozzle.  On the ABS it would happen slowly, but with the PLA, I can physically see it leak out.  The side effect is the ‘anchor’ it first builds on the corner of the HBP doesn’t always fully form… which can screw up the start of the printing session.  But this first print tured out a-ok.

Tiny PLA vase : Success!