Posts Tagged ‘ octopi

Building the C-Bot 3D printer: Part 31 : Setting up Octoprint

Jump to C-Bot blog index to see all the posts.


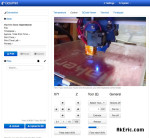
My previous post talks about the specifics of getting Octoprint setup, in general.  Here, I’ll talk about actually integrating it with my C-Bot 3D printer.

Up to this point I had a Raspberry Pi (upgraded to a v2 at this point) connected to my router via a USB wifi dongle, with a RaspberryPi Camera hooked to it, connected via a 3′ ribbon cable.  This was all sitting like a pile of spaghetti on my table.  I needed a way to get all this strapped to the C-Bot itself, which is what this post mainly talks about.  I should comment that during this process I gave up on the USB wifi dongle and switched to direct ethernet:  Just too many problems getting the wifi to stream the picam correctly.

Before we get into it, the end result:

3D Printed Items:

I needed a way to mount both the RPi2 to the frame of the C-Bot, and have some sort of adjustable mount for the camera.  Both of the below items were printed on my Makerbot Replicator 1.

RPi2 case:  After searching Thingiverse, I found this great looking “Raspberry Pi 2/B+ case with VESA mounts and more” file:  It both looks slick, has a slot for the RPiCam ribbon cable, and had holes to bolt it directly into the OpenBuilds V-Slot.  I should note the holes provided were too small for the V-Slot bolts:  I had to drill them out slightly, but once that was done it was easily mounted (see above pic, it sits on the right-front vertical arm).

PiCam Mount:  After more Thingiverse searching, I tracked down “B+ PiCam Ultimaker 2 timelapse harness” : This is both an adjustable arm to hold the cam, and a separate bracket for the cam:  I printed out all the files needed for the cam, and realized that it didn’t fit the 20×40 V-Slot: The ‘hook front’ piece was too wide to clamp properly.  I’d figured this would be the case, and created a modified version in Maya to narrow it, which is currently installed on the bot.  But if you don’t want to have to deal with this, I realized you can get a pack of small sticky-notes, and just tear-off the appropriate amount to create an easy-sized shim.  You can download my modified version on Thingiverse here.

Assembly:

  • I bolted the RPi2 case to the right-front 20×40 V-Slot extrusion.
  • I attached the PiCam mount on the right side of the top-front x-extrusion.  Zip-tied it down for safety.
  • My Rumba’s USB now runs directly into the Raspberry Pi 2.

Issues:

  • RPiCam ribbon:  Not easy to route, easy to catch things on.
  • Power to the RPi, the way I mounted it sticks out the side of the bot.  Easy to catch things on.

Final thoughts:  I’ve literally just started printing with it:  I usually print from either the C-Bot’s LCD, or from Simplify3D : So this is a whole new interface to learn (although, obviously similar to what I’m used to).  But I’m excited to start nocking out some timelapse movies :)

Setting up OctoPrint

OctoPiThis post will be a continual scratchpad of info as I use Octoprint…

I’ve toyed around with OctoPrint in the past:  Before I built the C-Bot I was seriously considering buying a Type A Machines Series 1 printer:  They use OctoPrint, so I’d installed it on a spare Raspberry Pi and played around with it and my Replicator 1.

With the C-Bot, based on its large build size, I want a way to be able to remotely track & control my prints:  If I’m not around I can check up on them, pause\stop them if needed in case of failure.  OctoPrint is perfect for this.  So I decided to finally get it installed and configured on my Raspberry Pi.

Below are the rough steps I went though to make this happen.  It’s still not quite ready yet for primetime:  I need a way to get the Raspberry Pi & it’s camera to correctly point at the build plate, and a slick case\mount to stick the RPi to the printer (see the next post).  But technically I have everything up and running now.

Update:  Note that all the trouble I had at any step with the install stemmed in some way from trying to configure wifi successfully:  I later switched over to ethernet, and all my problems went away.

My Tech Specs:

Setup Process:

  • Install OctoPi disk image.
    • GitHub : Download & install docs I followed.  See “Problems Encountered” below….
  • If you plan on accessing OctoPrint via the web, make sure that “Access Control” is on (which it is by default with any modern install of OctoPi), and you have a valid login.  See here.  First line of defense keeping people from taking control of your printer remotely.
  • In your router, give the RPi a static IP.  This allows you to log in consistently (locally or remotely), without worrying that your router can dynamically change the IP at some point.
    • While it was connected to my router (provided via Comcast), via the router’s control panel, I found and stored it’s MAC address.
    • Next I had to make my router “forget” the RPi:  For me, I had to first turn off the RPi, then in the router “block” it, then “delete it”.
    • With the RPi unconnected, using its MAC address I was able to add it it with a staticIP (My static range was 10.0.0.253+), rather than DHCP.
  • To allow for remote (web-based) control, in the router control panel, setup port forwarding based on that static IP, for port 80.
  • To view OctoPrint locally, I can browse directly to the static IP I assigned.  Note I was never able to go to hoctopi.local/ either over ethernet of wifi:  I get a constant “webpage not available”.
  • To view Octoprint over the web, I use a search like “what’s my ipv4” to find my homes IPv4 address.  Plugging that back into the browser takes me directly to the Octoprint control panel (presuming it’s on).
  • I have yet to setup a Dynamic DNS service for my IP.
  • Yet to mess with any of the Haproxy stuff.

Configuring the PiCam:

The defaults for the RaspberyPi Cam appear to be 640×480, I’m not sure of the framerate.  That’s a good base starting point, but it can be better.

  • I edited/boot/octopi.txt to set the res to 1280×720 (720p) at 30fps:  The camera tech-specs claim it can do this at 60fps, but I think that’s unnecessary for 3d printing.
  • In Octoprint, in Settings, under Webcam:
    • Set the ‘Timelapse bitrate’ to 10000k, to improve the timelapse movie quality after conversion.
    • Set ‘FFMPEG threads’ to 4 (since I have a RPi 2B, that is quad-core) : This will make the timelapse movie creation faster.
  • Next, I need to get a pair of +2 reading glasses to help bring the focal distance in.  Right now it seems to focus best at the rear of my printbed.

Problems Encountered:

  • I had decided to update my OctoPi image to current since the last install I had done was a good ten months ago:
    • After following all the install instructions, I was unable to get wifi working.
    • Based on the install instructions (here, under “How To Use It”), they have you modifying the octopi-network.txt file on the SD card:  I’m on a Mac, and used TextEdit to do this.
    • After three hours of being unable to connect over wifi, I finally dug out my spare monitor and keyboard, so I could log into the RPi directly.
    • I used nano to edit octopi-network.txt:  To my surprise, the password and ssid values, that should have been surrounded in quotes “”, were instead surrounded by solid white squares:  Some weird special character:  Changing these to “real quote characters” and rebooting fixed the connection issues.  Thanks a lot Apple…
  • I get terrible camera refresh when connected over wifi:  Maybe 1 new frame every… 30 seconds?  Unusable.  I pay for a smoking hot internet connection, so something is amiss.  My google ping is around 900 ms.  If I switch over to ethernet the cam us up to 1-5fps (just guessing) and my google ping is 10-20ms:  Actually usable.  In either case however, the machine control panel is responsive:  I’m able to remote control it without much lag.  At any rate, I ordered a new wifi adaptor (the one listed above), and I immediately got acceptable refresh:  A 1-2 second lag with 5-10fps.  Which wifi dongle you get really matters…
    • Update:  After two days, my new wifi dongle started behaving the exact same:  Super slow refresh.  I had to drop my capture rate to 3fps, at 640×480 for it to behave.  Any faster capture rate would cause increasingly bad lag in the view.  So I went out, got a 50′ cat5 cable, switched to ethernet, and problem solved.  Super speedy camera refresh.  Ethernet FTW.
  • On a number of occasions the PiCam wouldn’t turn on.  Long story short:  The 3d printed bracket it fits into was causing the small connector on the front of the cam to actually disconnect from the cam’s PCB.
  • For the longest time I couldn’t get OctoPrint to shutdown via its ‘System’ menu.  All the other buttons worked except those.  Long story short:  It appaered that having Chrome auto-log me in was causing this:  Logging out & logging back in (without ‘remember me’ checked) seems to have fixed it.

Links:

FAQ Topics: