Posts Tagged ‘ makerbot replicator

Building the C-Bot 3D printer: Part 31 : Setting up Octoprint

Jump to C-Bot blog index to see all the posts.


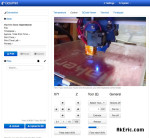
My previous post talks about the specifics of getting Octoprint setup, in general.  Here, I’ll talk about actually integrating it with my C-Bot 3D printer.

Up to this point I had a Raspberry Pi (upgraded to a v2 at this point) connected to my router via a USB wifi dongle, with a RaspberryPi Camera hooked to it, connected via a 3′ ribbon cable.  This was all sitting like a pile of spaghetti on my table.  I needed a way to get all this strapped to the C-Bot itself, which is what this post mainly talks about.  I should comment that during this process I gave up on the USB wifi dongle and switched to direct ethernet:  Just too many problems getting the wifi to stream the picam correctly.

Before we get into it, the end result:

3D Printed Items:

I needed a way to mount both the RPi2 to the frame of the C-Bot, and have some sort of adjustable mount for the camera.  Both of the below items were printed on my Makerbot Replicator 1.

RPi2 case:  After searching Thingiverse, I found this great looking “Raspberry Pi 2/B+ case with VESA mounts and more” file:  It both looks slick, has a slot for the RPiCam ribbon cable, and had holes to bolt it directly into the OpenBuilds V-Slot.  I should note the holes provided were too small for the V-Slot bolts:  I had to drill them out slightly, but once that was done it was easily mounted (see above pic, it sits on the right-front vertical arm).

PiCam Mount:  After more Thingiverse searching, I tracked down “B+ PiCam Ultimaker 2 timelapse harness” : This is both an adjustable arm to hold the cam, and a separate bracket for the cam:  I printed out all the files needed for the cam, and realized that it didn’t fit the 20×40 V-Slot: The ‘hook front’ piece was too wide to clamp properly.  I’d figured this would be the case, and created a modified version in Maya to narrow it, which is currently installed on the bot.  But if you don’t want to have to deal with this, I realized you can get a pack of small sticky-notes, and just tear-off the appropriate amount to create an easy-sized shim.  You can download my modified version on Thingiverse here.

Assembly:

  • I bolted the RPi2 case to the right-front 20×40 V-Slot extrusion.
  • I attached the PiCam mount on the right side of the top-front x-extrusion.  Zip-tied it down for safety.
  • My Rumba’s USB now runs directly into the Raspberry Pi 2.

Issues:

  • RPiCam ribbon:  Not easy to route, easy to catch things on.
  • Power to the RPi, the way I mounted it sticks out the side of the bot.  Easy to catch things on.

Final thoughts:  I’ve literally just started printing with it:  I usually print from either the C-Bot’s LCD, or from Simplify3D : So this is a whole new interface to learn (although, obviously similar to what I’m used to).  But I’m excited to start nocking out some timelapse movies :)

Howto: Pause Marlin for filament reload at a specific layer number

I’ve had fun in the past printing maps with water (SF Bay, Oahu) : Using my Replicator 1 & it’s Sailfish firmware, it was easy via the LCD to set a specific layer number to pause at:  Doing this, I’d calculate which layer the print transitioned from water to land, pause it there, and swap filament.

Marlin firmware (which is on my C-Bot) gives you no such feature via the LCD :  Which means you have to monitor the print, and when it appears land is printing, you quickly pause the bot, go through the manual steps (via the LCD) to lower the bed, possibly move the hotend out the the way, and do the reload.  Afterwards (via the LCD) you have to get everything back into position. Awkward.  I am aware that the latest cut of Marlin allows for filament reload via the LCD:  I’ve been unable to get it to work.  And even if it did work, it’s still not accurate enough since I’m guessing at the layer to pause at.  There must be a better way!

There is:  You can directly edit the .gcode to insert a chunk that will do exactly what you need:  Lets say you want to pause just before layer 2 starts:  You’d find the line starting with the layer change comment…

; Layer 2

in your .gcode file, and then paste this right above it (I’ve included the layer change comment in the below code, plus comments for what the commands are doing):

G91                  ; Put in relative mode
G1 Z10               ; Lower bed by 10mm
G90                  ; Put back in absolute mode
G1 X0 Y0             ; Zero (home) the X & Y
M0 Click To Restart  ; Pause and wait for the user
G91                  ; Put in relative mode
G1 Z-10              ; Raise the bed back up 10mm
G90                  ; Put back in absolute mode
; layer 2, Z = 0.45

Works like a charm :)

If your slicing software supports post-processing of the gcode, it’s possible you can do this work directly in the slicer.  I slice using Simplify3D:  In a given process, it has a section in its ‘Scripts’ tab, at the bottom, called ‘Additional terminal commands for post processing’.  This allows you to enter in script to do a text-replace in your file, to edit it for you.  I learned about it on a forum post here.

To do the above using that system, you’d need to enter this text into that field:

{STRIP ";   postProcessing,"}
{REPLACE "; layer 2," "G91 \nG1 Z10 \nG90 \nG1 X0 Y0 \nM0 Click To Restart \nG91 \nG1Z-10 \nG90 \n; layer 2,"}

Some really important things to note:

  • The fist line that says ‘STRIP’ is super important:  If you don’t do this, Simplify3D will embed a copy of the REPLACE line in the header of the gcode, but won’t properly comment it out, basically ruining the gcode.
  • In the STRIP line, there needs to be exactly three spaces between the semicolon ‘;’ and the ‘postProcessing text.  Any more or less will screw up the strip.  If you copy-paste this code, make sure there are three spaces in there.
  • As you can see, you need to insert newline characters (\n) into the string you’re building for it to show up properly in the gcode later.

Other notes:

  • Handy-dandy gcode reference.
  • If you don’t enter in some text after the M0, it’ll never un-pause (at least for me).
  • I got most of the code on my own, but was able to finish it off based on the help from this thread.
  • My printer starts off in absolute mode by default:  I know this because up at the top of the gcode, I can see a G90 command.
  • The S3D forum post here (under “Additional Terminal Commands For Post Processing”) list other post-processing commands you can use.

Building the C-Bot 3D printer: Part 22 : Final wiring, near final bot

Jump to C-Bot blog index to see all the posts.


Over Fri, Sat & Sun I probably spent close to 14 hours doing the final wiring:  So much measuring, cutting, splicing, heat-shrinking, wire-routing, etc.  But man it’s pretty thing when complete.  And it even turned on when I plugged it in :)

Below are a few pics:  I still need to make a tray for the power supply, print a case for the LCD, and finish up the dual filament coolers (when the fans show up), but for the most part it’s complete, and ready for tuning!


Jump to C-Bot blog index to see all the posts.

Trouble in paradise: The Replicator quit extruding…

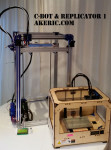
I’ve been using my Makerbot Replicator (1) to print all the parts for my new C-Bot build.  However as of a few days ago, it suddenly quit extruding correctly.

I print almost entirely in PLA, usually from 200-210 degrees.  Suddenly, I couldn’t get anything to print unless I raised the temp to 230-245:  Pretty crazy for PLA.  And the surface quality was terrible.  Any lower in temp and I could hear the extruder stuttering, and it wouldn’t really extrude much at all.

Leading up to this I had been printing at 120mm\sec, at .3mm layer height:  Squeezing a lot of plastic out of the nozzle at that rate.  I noticed a bunch of melted filament around the top-rear of the heater block (you only noticed it when specifically looking for it, couldn’t see it from the front\sides):  The only way it could have got there would have been backpressure from the nozzle squeezing it out of an improper location up-stream.  My guess is that this somehow started the domino effect to cause whatever was screwing up my current extrusion.  It had completely encased the back of the heater cartridge and wrapped around the thermocouple wires.  I had to heat the whole block up and carefully pick it away without damaging any of the wires.

Thanks to tips from this forum I got it resolved:  One suggestion was that the kapton tape that insulates the thermocouple had worn through, and by grounding to the heater-block it was giving inaccurate temperature readings.  This seemed like a prime culprit since I had to crank my temp settings so much higher.

I’m not sure specifically which steps fixed it, but this is what I did:

  • Did a complete teardown on the hotend, to the last bolt.  Removed old kapton, cleaned up head, wrapped in new kapton.
  • Removed heater cartridge and thermocouple : Didn’t noticed any wear-through on the thermocouple kapton, but added more just in case.
  • Did however noticed where the wire leaves the thermocouple and bends up around the heater block : one of the bends looked a bit frayed, and was mighty close to the heater block itself:  Added extra insulatory kapton at that junction.
  • Added a new nozzle, just to weed that out.
  • Re-bed level, etc.
Extrusion was immediately was back to normal after that, thankfully.  I was beginning to think the Replicator was getting jealous of the C-Bot build…. 😉
Some words of wisdom from Ryan Carlyle on the above thread:
General rule of thumb is that PLA does not print reliably over 10 mm^3/sec with a typical Replicator type hardware setup. At 0.3mm layer height, 0.4mm extrusion width, and 120mm/s, you’re doing 14.4 mm^3/sec. That’s reasonable for ABS (which melts faster) but not for PLA. Raising the temp may cover the symptoms for a while but it can also lead to charred filament and worse clogging issues later on.

3D Printing Cars In Carbon Fiber PLA

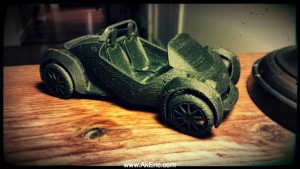
For Christmas I received some Carbon Fiber PLA from Proto-Pasta.  I’ve been trying to figure out what to print with it, so I settled on the Strati, the ‘3d printed car’ from Local Motors: They were cool enough to upload the stl’s for it to Thingiverse.

strati_filter

Sliced with Simplify 3D.  I had a heck of a time getting it to print however:  To get success, I had to increase my layer thickness to 300 micron (from 200) printing at 220 deg @ 90mm\sec.  I reached out to their support, and they were prompt to reply with suggestions.  I look forward to printing more with it, the finish quality is really cool, almost like 3d-printed coal.