Posts Tagged ‘ core-xy

Building the C-Bot 3D printer: Part 28 : Lighting, Ringing, Breaking

Jump to C-Bot blog index to see all the posts.


This update is a combo post on several subjects at once:

Adding Lighting

Up until now, the C-Bot has been a dark printer:  No internal lighting whatsoever.  My Replicator1 is like a little supernova next to it when the room is dark.  But no longer:  Over the weekend I added both an 12v LED strip to the top-front X-beam (pointing directly at the print-bed) and a superbright LED directly on the print-head itself:

While my buddy Mason did a slick job of wiring his LED strip directly into the Rumba board on his C-Bot, so he can adjust the lighting based on the print settings, I did not:  I ran a extra 12v lead out of my power-supply, and connected both the LED Strip, and the superbright LED (with inline resistor) directly to it:  Turn C-Bot on, lights turn on.  Nuff’said / good enough.

Breaking

After I installed the lighting and turned the bot back on, the Bowden extruder suddenly started jittering:  It would no longer extrude filament.

I started by swapping a DRV8825 stepper driver from the z-steppers to the extruder stepper slot:  Try extruding, and it works.  Ok, it must be a bad DRV8825, and I have no spares.  But I do have a bunch of extra A4988‘s:  I’ll just put one in there, and updated my firmware to use it instead.  It doesn’t work:  Jittering starts again.  So I revert the firmware change, and put a ‘good’ DRV8825 back in:  Jittering.  What is going on?

Soon, any DRV8825 I put in that slot causes jittering, but they all work when plugged back into their original slot.  Drivers are good,… is my board bad?  At this point I disconnect the 4-prong JST connector running from the board to the stepper, and notice that one side is slightly melted: I remove the wires from the connector, and connect them on-by-one to the pins on the board:  Everything starts working again.

Canibalizing a connector from some other wires, I reinsert the leads, plug it into the board, and back in action.

Seriously?!?

Improving Ringing / Ghosting

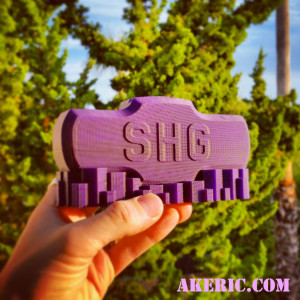
I had recently printed out a “Sledgehammer Games Recognition Coin Holder” for someone at work (I modeled it in Maya / Tinkercad):  We can give out cool coins to fellow employees for doing good work, and I designed this coin holder so people can show them off (there’s four slots in the top to hold the coins).

I’d printed many on my Replicator 1 in the past, and printed this one on the C-Bot for the first time.  And what I noticed was, there was a terrible amount of ghosting / ringing happening:

shg_recognition

Click to see the full-size that really shows the problem off.

This was printed with the .6mm E3D-Volcano nozzle, 300 micron layer heights at 60mm/sec, in MakerGeeks Royal Purple PLA.

The issue was, the prints done on my Replicator 1 had less ringing than the C-Bot, and this didn’t make sense to me:  The C-Bot has a Bowden extruder, thus removing a bunch of moving mass from the toolhead, not to mention it uses Core-XY mechanics, that is supposed to help out as well.  Why are things worse?

Posting this question to the 3D Printing Google Group, I got a bunch of good answers.  Specifically, my firmware acceleration may be too high, and the size of the printer itself could be causing too much shake, do to the lack of additional cross-members for stability.  Right now I have no surplus extrusions to stiffen it up, and my ultimate goal is to bolt the printer directly to the wall, thus really locking down any shaking.  But in the meantime, I can adjust the acceleration in the firmware.

I made a ringing/ghosting test model in Maya that would show off the issue on X, Y, and XY all at the same time.  I printed it with my default settings (3000 mm/sec), then dropped it waaay down to 800 mm/sec.  The results were pretty obvious:

ringing_comparison

Click for bigger pic

On the left of each image, is the ‘800 mm/sec acceleration’ print, and on the right is the ‘3000 mm/sec acceleration’ print.  These changes were made in Marlin’s Configuration.h:

#define DEFAULT_ACCELERATION 800
#define DEFAULT_RETRACT_ACCELERATION 800
#define DEFAULT_TRAVEL_ACCELERATION 800

I just set everything that looked applicable to 800.

So, an noticeable improvement.  But once I get the printer “bolted down”, I hope to be able to print even faster, with better results.


Jump to C-Bot blog index to see all the posts.

C-Bot 3D Printer: Resource Page

Jump to C-Bot blog index to see all the posts.

This page is a collection of resource for building my Core-XY C-Bot printer:  Electronics, hardware, software related.

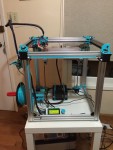
Finished C-Bot!

Finished C-Bot!

OpenBuilds Links:

  • Main C-Bot page : Includes printed part picture links, and external 3d files that are needed (for the Bowden extruder, etc).
  • C-Bot Forum : Fantastic Resource
  • C-Bot File List : Original BOM, assembly guide, and all the stl’s to print.
  • Link to my BOM.  This is a modified version from the OpenBuilds page based on my specific needs.
    • Note when ordering the hardware:  Think about the overall color of the printer:  Many nuts and bolts can come in silver or black:  Do you care? Should they all be one or the other?  Worth considering.

Hardware:

Core-XY Mechanics Theory Link

To build the 12″ x12″ x24″ build volume, these were my extrusions lengths:

  • The below labeling corresponds with the Assembly Guide updates (above link) that Mason Sheffield made.
  • 20×40 OpenBuilds V-Slot Extrusions:
    • A : Vertical Legs : 4x 820mm
    • B : Top/Bottom Horizontal X : x4 440mm
    • C : Top Horizontal Y : 2x 450mm
    • D : Base Horizontal Y : 2x 420mm
    • E : Print Bed Supports (Mounts to G) : 2x 395mm
    • F : Top XY-Gantry (what extruder mounts to) : x1 464mm
  • 20×60 OpenBuilds V-Slot Extrusions:
    • G : Rear Z-Slider : x1 428mm
  • ACME Leadscrews : 2x 705mm

Important notes though:

  • Using the E3D Volcano Extruder subtracts 2″ from your build height based on how much it hangs down.  And, the above calculates on the Z-axis were still off, so right now I’m at a practical 21″ build height not 24″.  To resolve a few options:
    • Cut longer A lengths.
    • Redesign the extruder holder to move it ‘up’ more.
    • Since my z-gantry is a 40×60, I could actually move the whole build-platform down by 20mm by sort of ‘reversing’ it.  however, I feel that design would give less overall strength to it.
  • Basically, calculate your extruder length into your overall height.

Electronics


Software/Firmware


Jump to C-Bot blog index to see all the posts.
Building the C-Bot 3D printer: Part 1

Jump to C-Bot blog index to see all the posts.


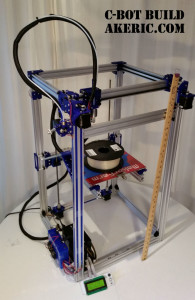
Sneak peek of the final result:

Finished C-Bot!

Finished C-Bot!

This series of blog posts tracks my progress of building a “C-Bot” 3d printer.  All the pages should be considered living documents, and will get updated throughout the build as I learn/understand more of the process.

This is not a ‘printer build howto’, but rather my experience during the build.

Also, this is by far the most complex thing I’ve ever built:  While I’ve been actively 3D printing for three+ years now, have built quite a few electronic/robotics projects (as covered by this blog), and have no fear of programming, I definitely feel like an explorer who just crested a rise to see a fascinating valley full of unknown wonders I must traverse.  I hope the locals are friendly…


I’ve owned a Makerbot Replicator (1) 3d printer since early 2012 (when they were first released).  Like all 3d printers it took some time to get ‘tuned in’, but overall it’s been an extremely reliable machine, and I haven’t had any problems with it for over a year.  However, I’m yearning for something more.  Specifically, something bigger.

The idea of a cubic foot is enticing, but limiting:  At that size, my first (and really only, based on my specs) choice was the Type A Machines Series 1 ($2749, or $3199 for the new Pro):  I love everything about it, and they make it close to where I live.  I was almost ready to pull the trigger on it, when my friend and co-worker Mason Sheffield did some research, and decided to build the “C-Bot“, over on OpenBuilds.  He’s been blogging about his experience here.  The C-Bot was designed by Carl Feniak, and seems to check all my boxes:

  • Core-XY mechanics.
  • Modular size: make it any size\shape you want (within reason).
  • High-resolution, fast.
  • OpenBuilds V-Slot linear-rail system for all moving parts.
  • You choose the electronics.

Carl did a great job with providing build documentation and a BOM, considering he’s releasing it all for free.  Mason took that improved upon it with more info, and even redesigned some of the printable parts.  All told he probably spent around +-$1200 (+ his time) for a great printer with a square foot build volume.

The rear of Carl’s C-Bot

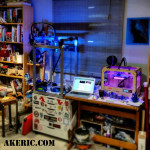
mason_c-bot

Mason’s C-Bot


The closest competitor doesn’t even come close to that cost:  The F306 (which looks amazing) is around $4k, and the Makerbot Z-18 is $6500.   I liked the size and specs of the gMax 1.5 XT ($1895), but I’m not a fan of moving build platforms.  The Rostock Max kit is also a great value ($1k), but talking with their support and users, it just didn’t have the speed I was after.  I should note I’m not trying to speak ill about any of them, they all seem like solid offerings.

While I was on vacation I loaned my Replicator to Mason, and he printed out all the parts for his printer (and mine, before I was even sure I wanted to build one).  When he got his printer assembled & running, and started bringing the results into work, I knew it was the time:  Armed with Mason’s updated BOM, over the course of two days I ordered all the parts, and am currently eagerly awaiting their arrival.  The only difference between mine and his:  Mine will have a build volume two foot tall, with a negligible impact on price:  just some longer aluminum extrusions & wires.

That means I’ll have a core-xy printer with a two cubic foot build volume, for around $1300.  Presuming I can actually build it :)

Current Hardware\Firmware highlights:

Future posts will cover the build process as the parts arrive!


Jump to C-Bot blog index to see all the posts.