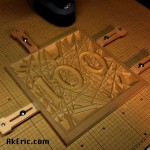
Using Autodesk Fusion 360 with the X-Carve CNC & 3D Mesh
Overview
I’d been stuck on an old Macbook Air for all my CAD/CAM work for the past number of years. And because of that, I was limited to MeshCAM (no disrespect, I quite like it, but one of the few mac apps for CNC I could find) for all my 3d-mesh carving. I’d dabbled with Autodesk Fusion 360, but the ol’ Mac wasn’t powerful enough to handle it well unfortunately.
Finally got a new PC, and can start to branch out into other CAD/CAM apps. I’ve been using my X-Carve CNC for just over a year now, been a great learning experience both with its hardware, and the CAM software that generates the toolpaths for it. And as much as I appreciate how much I’ve learned from MeshCAM, I felt like there could be a more robust solution, and that’s where F360 comes into play. I am by no stretch any sort of CNC expert, just an avid hobbyist, but I was really surprised how much the F360 team has put into its CAM solutions.
The below post is an overview on my first steps to get it working, specifically for cutting 3d mesh (rather than parametric solids) so I don’t forget what I did in the future.
I should note though, if you don’t care about cutting 3d mesh, this tutorial is still a valid intro to generating toolpaths with F360.
Disclaimer : Not a CNC expert. Not a F360 expert. What I list below are ways I figured out how to do things by looking through the docs, and a lot of forum posts. There may be better ways out there to do any of this. If so, please let me know!
Note, I use the term “RMB” a lot below. That means “RightMouseButton”.
Updates:
- 2017-04-23 : Based on the 2.0.2989 release, they made a huge improvement to importing mesh for CNC cutting. While I’m not going to go through this whole post updating it, things worth calling out include:
- It doesn’t have to be a solid body.
- You no longer have to convert your mesh to a BRep to cut it.
- It does seem a little twitchy: Some mesh will come into the CAM workspace fine, others does not.
Fusion 360 CAM Docs
These are the docs I got the most out of when it came to learning its CAM capabilities.
- Introduction to 2D Milling
- Tutorial 4 – High Speed 3D Machining
- Tutorial 5 – Advanced 3D Machining
- CAM Expression Variables in Fusion 360 : These are variables that can be called to when authoring custom expressions for setup parameters below.
And an informative tutorial:
F360 Installation
Really nothing to report here: Install went off without a hitch. It should be noted that F360 is cloud-app, meaning everything you do gets uploaded to the cloud. I remember back in the day when it first came out there was a way around this, to only ever work locally. I’ve not looked into that recently though.
Importing your mesh
F360’s CAM package can’t deal with 3d mesh natively (at least, I’ve been unable to find a way) : You first need to convert it into a solid it can deal with. And in this case, it needs converted to a ‘BRep’ : I’ve been unable to actually figure out what the definition of a BRep is, but I’m guessing it’s a (solid)BodyRepresentation. This process probably took me the most time to figure out, not having a broad knowledge of how F360 works. The trick is, you can’t have any ‘history’ enabled when you do the conversion : The menu won’t even be there if that’s the case.
Note if you don’t care about 3d mesh, and just want to cut your solids, you can just skip this section.
Prep the mesh for import
Before you import/convert your mesh, you should be certain of a few things, based on the way you want to import/convert the mesh:
- There are no holes in it. It should be a solid mesh, no non-manifold geometry… quality solid geometry.
Triangulated:
- It should be triangulated: While F360 accepts quads or n-sided polys, I found that it’s internal triangulation function, which appears to be auto-ran when converting to a BRep, sucks, causing poorly converted mesh. Pre-triangulate your mesh.
- F360 will complain (but still do the conversion if you tell it to) if the mesh is over 10k tri’s, citing poor performance to BRep’s. I presume this is for good reason. Right now, I just auto-downres my mesh via Meshmixer or Remake.
- Note, if you want to use this method on mesh that is more than 10k tris, you can cut your mesh up into 10k or less chunks via software like Meshmixer, export all those chunks, then import them all in one at a time via the below instructions. Super clunky.
Quadrangulated:
- If you want to get passed the 10k poly limit, you can instead import quad-based OBJ data. The trick is to first get it converted to a quad obj: I learned most of this from this video.
- Very important: Make sure in your F360 Mesh Preferences, the “Triangulate Mesh Polygons” option is turned off.
- Based on what I’ve read, you can do this via Remake: First you should still decimate the model to some reasonable amount (via its Retopologize menu).
- Then, via its Export Model windows ‘advanced’ tab, you can choose OBJ(Quads) as an export format. You can additionally reduce the poly count here, but remember the tri count will be 2x the quad count you’re putting in.
- Also note, this tool likes to blue-screen my PC from time to time

- I’ve tried to get software like Meshlab to convert to quads and export as an OBJ, but F360 doesn’t seem to like that output (maybe I’m doing it wrong…).
Import into F360
Initial import steps:
To import in your mesh, regardless of it being triangles or quads:
- From the Model Workspace, access Create -> Create Base Feature
- Insert -> Insert Mesh
- Browse to the mesh on disk, hit “Ok” in the “Insert Mesh” dialog
If you have triangulated mesh:
- Once inserted, access the RMB marking menu on the mesh and “Mesh to BRep”
- Finish Base Feature via the top menubar.
The imported mesh:
Via either method, at this point you can delete the original mesh from the Browser.
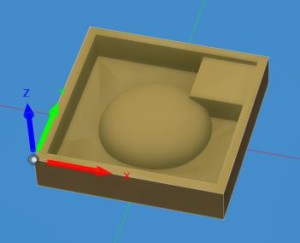
This will now give you a ‘body’ the CAM package can deal with.
If you have quadrangulated mesh:
- Press the “Finish Base Feature” after the mesh is imported.
- Press the Create -> Create Form button: This will open the Sculpt Environment.
- Utilities -> Convert
- Choose : Quad Mesh to T-Splines
- Select the mesh
- Hit OK
- This will create a new T-Spline body.
- Press “Finish Form” From the top menubar: This will auto-convert the T-Spline into a BRep (Body1), ready for CAM.
- And again, here’s the video link I learned most of this from.
Dealing with scale
Note, that based on where you authored your mesh and the units it was in, you may need to scale it up. For example, I work in Autodesk Maya in cm units. I need to scale that mesh up by a factor of 1o either before I export, or once in F360, to get it in mm correctly.
Setting up CAM
First, switch to the CAM workspace in F360.
Manage your tools
Before you can start making toolpaths, you need to tell F360 what cutting tools you have: Via the CAM workspace, access MANAGE -> Tool Library.
Uncheck all the libraries on the left except “Local”/”My Tools”. Select “My Tools”.
Press the “New Mill Tool” button on the top bar, and start filling out the info for all the bits you own/want to cut with.
Nice page showing what all the values mean: “New Mill Tool Reference”
But in general the below values are always equal to or less than the one that came before it, from the “Cutter” tab:
- Overall Length: Total length of the tool, say, 2.5″ for a fictional bit.
- Body Length : How much of the tool sticks out of the chuck, or “Holder” in F360 terms. Obviously variable every time you insert it, but say 1.5″ here. That leaves 1″ inside the chuck.
- Shoulder Length: From the tip of the bit to the last part of the thread, even the non-cutting part of the thread, say 1.25″. That leaves .25″ between the end of the shoulder, and the chuck.
- Flute Length: Length of the cutting surface, like 1″: There’s .25″ of non-usable cutting surface.
I should also note that with the 1/4″ chuck on the DeWalt611, it has 2″ of internal space for bits.
You can also make “Holders” for your different chucks: Doesn’t seem necessary, but I did it anyway.
Create a Setup
Setups collect the rules that define the the stock to cut, and the toolpaths to cut in them.
Via the SETUP menu: New Setup : This will immediately open the SETUP dialog. Below are good defaults I start with, but obviously every situation is different. I skip over values I don’t change.
- Setup Tab
- Stock Tab
- Stock
- Mode : Relative Box Size : This creates stock relative to the size of the model you’re working with.
- Stock Offset Mode : No additional stock: The stock is the exact size of the model.
- Stock
This creates a new Setup for the given solid model. If you hide the body via the lightbulb in the browser, you’ll see a ghost of the resultant stock:
Create a rough clearing operation
Now that there is a setup which defines our stock and the WCS origin, we can start adding toolpaths. The order is important, since F360 cuts them in that order in Simulate mode.
Note, F360 has great tooltips, many with pictures: Hover over the given field and see what pops up.
Via the “3D” CAM button, there are two clearing options available: “Adaptive Clearing” and “Pocket Clearing” :
- Pocket clearing is closest to what I’m familiar with in MeshCAM: It removes material layer by layer, which is good for a light-weight machine like the X-Carve.
- Adaptive Clearing will attempt to burrow down to the full length of your tool, then start cutting material against the full length of the tool. While this sounds great, I’m not sure how well the X-Carve would handle it, and have yet to test at this point (probably would need to cut very slow…).
Choose the “Pocket Clearing” operation:
- Tool Tab
- Tool : Select a tool you defined above. The below “Feed & Speed” section will be auto-populated with that tools defaults.
- Feed & Speed
- Adjust as necessary based on the type of material you’re cutting. How do you know what to set? Based on my hobbyist level experience it’s all about learning what others have done, + trial & error.
- Geometry Tab : Controls what area of the mesh will be machined.
- Heights Tab: A nice graphical way to set the vertical areas to be machined, and how far the tool-head should retract.
- Passes Tab
- Passes
- Manual Stepover : If you want direct control over this, you can check this and set the min/max values. Note that F360 can either use hard-coded values, or expressions for the fields : RMB on the “Maximum Stepover” field and “Edit Expression”: You’ll see something like this pop up:
- Math.max((tool_diameter – (2 * tool_cornerRadius)) * 0.95; tool_diameter * 0.20)
- Change it, edit it, etc, based on your needs. Here’s an example video on how to do that.
- Direction : Climb by default, but machines like the X-Carve should have it set to “Conventional”, so the cutting edge bites into the material with the direction of toolhead travel.
- Manual Stepover : If you want direct control over this, you can check this and set the min/max values. Note that F360 can either use hard-coded values, or expressions for the fields : RMB on the “Maximum Stepover” field and “Edit Expression”: You’ll see something like this pop up:
- Stock to Leave: Here you can set how much stock is left over for the finish passes. How much should you leave? I generally make this a percentage of the diameter of the finish bit I’m using.
- Smoothing : In general it sounds like you want this checked on, check the tooltip.
- Passes
- Linking Tab
- Linking
- Retraction Policy : I’ve had good success with “Minimum Retraction”.
- Ramp
- Ramp Type :
- If you’re cutting wood, “Plunge” seems good. If you’re cutting metal, then “Helix” is the way to go.
- Ramp Type :
- Linking
There are obviously many more options, but the above got me started well.
After you hit “Ok” in the dialog, you’ll see the new Pocket operation in the browser show up : While it’s calculating the toolpath a % value will be visible. After a few seconds, the toolpath should show up, presuming you have the pocket operation selected.
Create one or more finish operations
F360 comes with quite a few finish operations. Technically you can use can combine as many as you want, but again, build them in order of operation. In this example, I’ll use the “Parallel” operation, because it most closely emulates what I’m used to in MeshCAM.
Via the 3D Menu access “Parallel” operation:
- Tool Tab
- Tool : Select the tool for this pass. But default it’ll choose the tool used in the operation before it. Note if you choose a different tool, obviously you’ll need to go through a toolchange operation (which on the X-Carve is a very manual step), and need to save out your gcode as multiple files.
- Geometry Tab : Controls what area of the mesh will be machined.
- Heights Tab: A nice graphical way to set the vertical areas to be machined, and how far the tool-head should retract.
- Passes Tab
- Passes Options to control the angle of the surface to be machined, the stepover, etc.
- I like to set my stepover to be 10% of the bit width to give a nice, smooth finish, which you can set as an expression by RMB on the “Stepover” field & “Edit Expression”:
- tool_diameter * .1
- I like to set my stepover to be 10% of the bit width to give a nice, smooth finish, which you can set as an expression by RMB on the “Stepover” field & “Edit Expression”:
- Smoothing : Like in the rough cut, this seems good to check on.
- Passes Options to control the angle of the surface to be machined, the stepover, etc.
- Linking Tab
- Linking
- Retraction Policy : I’ve had good results with “Minimum Retraction”.
- Linking
After you hit “Ok” in the dialog, you’ll see the new Parallel operation in the browser show up : While it’s calculating the toolpath a % value will be visible. After a few seconds, the toolpath should show up, presuming you have the parallel operation selected.
Like mentioned above, you can add more finish passes using different techniques here as needed.
Name your setup and operations
It’s a good idea to name your setup and operations, so you know what you were up to months later. Click once on a name in the Browser, then click again after a second: It’ll let you rename them:
Save operation templates
Presuming you get values you like and want to resuse thes on other cuts later, there are two ways to access the data:
- You can open a previous cut, then RMB on any operation and “copy” it. You can go to your other cut’s setup, and “paste” it. Works, but clunky.
- Better, is to select one or more operations in the browser, and RMB on them -> Store as template : This will give you a broswer to your local HD for storage, and later import via the “Create from Template” Setup RMB menu.
Simulate / preview the cut
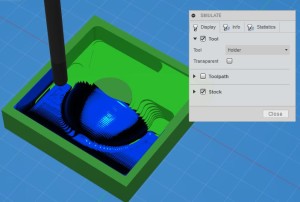
This is an incredibly powerful part of F360: You can pre-visualize your cut. Either select your setup folder in the Browser, or multi-select all the operations you want to preview (basically, whatever toolpaths are shown will be simulated), and press the ACTIONS -> Simulate button.
In the SIMULATE popup, check on the “Stock” box. This will show you the uncut stock. You can uncheck the “Toolpath” if you don’t want the lines to obscure the view. Then simply press the > Play button at the bottom of the screen: All the selected operations will begin previewing their cut:
Using the correct postprocessor
For F360 to generate the correct gcode/nc data, it needs to be post-processed for your given machine. Since I’m using an Inventables X-Carve (grbl-based), I had to do some searching.
This section has been edited since the original blogging: Originally I’d found a couple postprocessors online, and they “worked”, but had a “bug” where at the end of the cut, they’d send the machine back to the “machine home” (where the toolhead was when the machine was powered on), not the “work home” (the zero/home position of the cut). This caused two failed cuts for me as the tool-head ripped into my stock trying to go somewhere bad.
After troubleshooting and posting on the forums, I was made aware that F360 comes with a ‘generic grbl postprocessor’, that needs only one small adjustment. I’ll show that info below.
Generate or “post” the gcode/nc data
Once you’re happy with your toolpaths, you can ‘post’ the data for your CNC to use.
The big decision here is how you’ll save the operations you’ve made previous: If they all share the same bit, you can select them all at once in the Browser, and save a single file for all of them. However, if toolchange is needed, you should save each operation as a separate file, selecting one at a time and going through the below steps.
Via the ACTIONS -> Post Process Menu:
- Setup your postprocessor. Since I’m using an X-Carve that runs grbl:
- Setup : Use Generic Posts
- In the Post Configuration section, select “grbl.cps – Generic grbl”
- In the “Property” section in the bottom right, make sure that “useG28” is “No”. If this is “Yes”, it’ll return to machine home (instead of work home, where you zeroed the cut) upon completion of the job, discussed above. If this is “No”, it simply raises the toolhead and leaves it there.
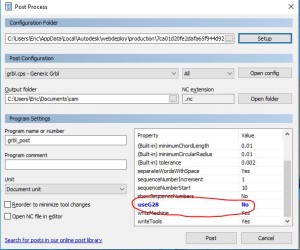
- Define the Output folder where you want the .nc data saved.
- Under Program Settings, set the name of the file under “Program name or number”.
- Press the “Post” button: The .nc data is saved to disk.
Cutting with the data
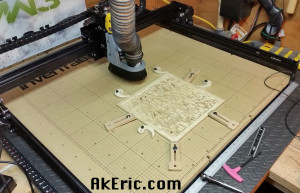
There are number of sender software available to send the .nc data to your machine: Easel (browser-based) can do it, I’ve had success with Chlipeppr (browser-based), I hear good things about LaserWeb/CNCWeb (browser-based, not yet tried), but currently use Universal GCode Sender (Java applet) for all my work.
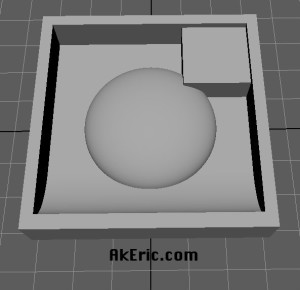
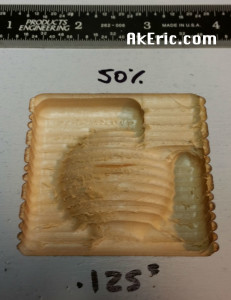
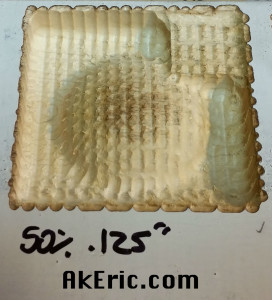
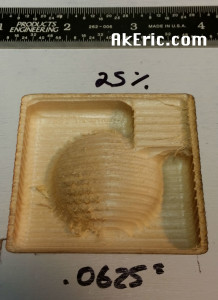
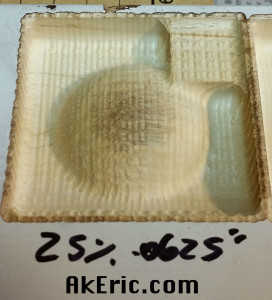
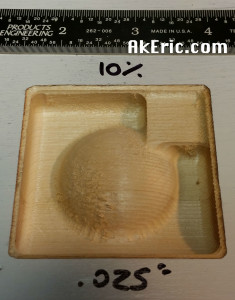
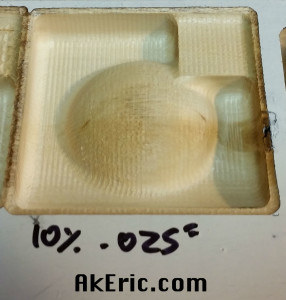
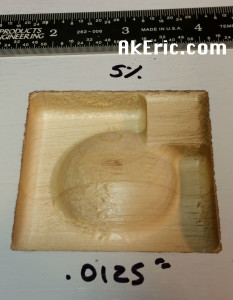
The F360 data didn’t cut any differntly in UGS than MeshCAM data, and had great result:
In fact, the few hard-edges around the hemisphere are due to a pencil-cut I was toying around with as an extra pass.
In Conclusion
I feel F360 provides a tremendous amount of power to the hobbyist CNC user, especially considering the price (free). The learning curve is a bit steep, but it has a large amount of helpful documentation, and videos available. It’ll be my go-to piece of CAM software in the future, hands down.


