Building the C-Bot 3d Printer : Part 33 : Machining a mic6 aluminum removable build plate
Jump to C-Bot blog index to see all the posts.
Overview
I’ve been using removable glass build plates for years on both my Makerbot Replicator 1, and my custom C-Bot: I get double-thick glass cut at my local hardware store (Orchard Supply Hardware has had a great price on this), always thinking it was ‘totally flat’. But is it really? My C-Bot has a 12×12″ heated build platform. When I go to level it with the glass, I get each of the four corners dialed in perfectly. But the middle always sags slightly… even though it’s glass. Double-thick glass. But glass is actually somewhat plastic, and this sag has always bugged me.
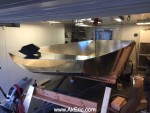
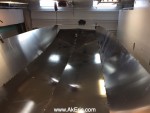
Back in December I assembled my 1000mm X-Carve CNC, and it’s been so much fun cutting wood. I knew it could do aluminum as well, but needed a project. And that’s what this post is all about: Using my X-Carve to machine a new removable build plate out of .25″ mic6 aluminum for my 3d printer. I am so happy with the results.
Sourcing the material
Before I started this, I had no idea what ‘mic6’ aluminum was. It’s also referred to as ‘cast aluminum tooling plate’ or ‘ATP’, since mic6 appears to be a trademarked brand name. Simplistically, it’s a standard for (among other things) a very flat aluminum plate, to .001″. After reading a plethora of forms, and researching my local options, I settled on Midwest Steel And Aluminum’s “Cast Aluminum Tool & Jig Plate“, .25″ thick, 12×12”, which came to about $20, and the ground shipping another $20. I could have bought it locally for $45 + tax (ugh).
A note on the order: The plate was packaged in one layer of cardboard, that was it. It appeared to have been dropped several times in-transit, 3 of the 4 corners were blunted, and there was an small indentation in the middle of plate itself. If I was using this for something really precision I would have returned it. Just a note to tell them to ship it better if you go this route.
Once it showed up, time to make some cuts!
Initial cuts
When I first got the plate I knew I had to notch a section out of each corner, since the heads of the bolts that hold the MakerFarm heated build platform stick up about 1/8″ish from it: I didn’t want the plate resting on the bolt-heads, so I need to make little pockets for each. Before I even considered my X-Carve CNC, I figured I could use my drill-press to pocket these. Long story short: It did not work well, and made a mess of the corners. Based on that frustration I went down the ‘how about I use that dormant CNC right next to the drill press…” road.
For all below cuts, I used the same 1/8″ 2-flue upcut carbide endmill.
Since these cuts were so simple, I used Inventable’s Easel: I designed a circle with a diameter of .4″ across, .175″ deep, and used that to pocket each of the four corners already mangled by my drill press. I used the default ‘aluminum’ Easel setting (5 ipm, .003″ doc, DeWalt on speed 1) with the first pocket (which took about 20 minutes), then started cranking it up: By the final pocket I had it running at 20 ipm at .01″ doc, with the DeWalt on speed 2, taking about 5 minutes.. It did great, and the bit was cool to the touch after the cuts. When all four pockets were complete, it fit right on the bed with no collision with the bolt-heads:
 All the rough stuff to the right of the bolt-head was the abuse by the drill-press.
I have four bulldog clips that hold the plate on, one on the middle of each side. The issue is even though I’ve bent them down to move them out of the way, parts of them still stick up slightly, and on a large print the nozzle could collide with them. So going back to Easel, I designed a new rectangular pocket that would keep the bulldogs out of the way of the toolhead. These were 2.25″ x .3″, cut .075″ deep. I positioned them in the center of the left\right sides of the build plate, but had to offset them on the front\back based on my leadscrew config.
An in-process cut:
And all four final cuts:
Installed on the printer: No more clearance problems with the bulldogs! 
Prepping the plate
I use a highly secret (50% wood-glue, 50% water) slurry on my build plate to get PLA to stick. But the mic6 is so smooth, I first scoured it with steel wool for several minutes to give the glue something to bite into.
Note for the future: First, use something like lacquer thinner\acetone\mineral spirits to clean the plate of any oils: Quite to my surprise, after many minutes of scrubbing, I could clearly see my handprint on it. The oils deposited from my hand actually protected it from the steel wool. So I went back and liberally scrubbed it with lacquer-thinner soaked rag, then went back to the steel-wool treatment again: No more handprint. Be sure to wipe it down with lacquer thinner after the steel wool too: The wool actually leaves quite a bit of itself deposited into the aluminum.
After the plate was scrubbed, cleaned, and glue-slurry applied, I did some test prints. And while the flatness was super awesome, I realized something very quickly: The slicer said the bed heated up waaaay faster than it actually did: For big prints in PLA, I’ll heat the bed up to 60c.
It dawned on me that the thermistor that does the temp reading is taped to the bottom of the MakerFarm heated build platform, while the thing being printed is sitting above it on .25″ of aluminum… that is taking much longer to heat up.
After brainstorming, I came up with the idea of cutting a groove into the bottom of the plate, that I could tape the thermistor into: It should then be reading the temp from the removable plate itself, providing a much more accurate temperature. This means I’ll also need to snip the leads running to the thermistor and install a barrel-jack into the mix to allow for the plate to be removed, since there’s now a sensor taped to it.
Secondary cut
Going back to Easel, I designed a .5″ wide groove cut .0312″ deep that I could recess the tape into, then another smaller groove .2″ across and .1″ deep to run the wires to the thermistor.
Here it is mid-cut:
Cut gotchas:
- Easel has (based on what I’ve experienced) no idea of conventional cuts (bit spinning in the direction of travel) and climb cuts (bit spinning opposite direction of travel). From what I’ve read, climb cuts can provide better finish, but only on ‘professional\beefy’ machines: not the X-Carve. Conventional cuts fare much better on the X-Carve. This (as I found out) can cause dangerous problems.
- When the top cut started, it was all conventional cuts, and cut fine. But when the next layer started, and for every layer down, it was climb cuts. Because of that, I noticed a lot of bit defection, chattering, and even gouging. To avoid catastrophe, I had to manually monitor the cut, and really crank up the spindle speed as needed to compensate.
- Note that MeshCAM gives you the option in the rough-cut to do either conventional or climb cut: For future aluminum projects I’ll be using it for sure.
To help with heat transfer (that is only a theory of mine) and to prevent any sort of plate-slip (which is legit), I shoot the bottom of the plate with rubberized undercoating. I then snipped my thermistor line, soldered barrel-jacks onto either side of it, then taped it into the groove on the bottom of the plate:
Putting it back onto the HPB, I reconnected the barrel-jacks:
Final thoughts
It works, great.
When the HPB heats up, and it finally gets to temp…. it really feels like the top\bottom are the same temp. And I can level each of the four corners, and the middle is the exact same distance as the rest of them from the toolhead.
Super rewarding project with one machine improving another.
Jump to C-Bot blog index to see all the posts.


