Posts Tagged ‘ Processing

Android Adventures

Go to part 2…

I finally got a smartphone:  Samsung Captivate.  Why?  Mainly since the bar for making apps on them seems pretty low, which is something I’ve wanted to try for some time.  Plus after seeing these two posts…

And their reference to Processing For Android

…and considering my love for Processing
…it just all seemed to make sense.

The first thing I wanted to do though had nothing to do with Processing:  I wanted to get the ‘Scripting Layer For Android‘ (SL4A) installed on it so I could run Python (which I love more than Processing), in a shell, on my phone.  I documented how to do this on the Android Emulator in a previous post (and waxed lyrical on how I’d like to program on an Android phone in a post before that). However, to get all this working on a real phone, I had to jump through some hoops.

Disclaimer:    I’m a total smartphone\Android noob, and this is the first time I’ve ever written words like  ‘sideload’ or ‘root’.  I did this a day after getting the phone, never having owned a smartphone before.  So for most of  it I was just fumbling in the dark.  There may be easier ways, but I had a terrible time finding any kind of documentation on anything.  Any documentation I did use is linked to below.

A.  Time To Root:

AT&T in its infinite wisdom has disallowed ‘sideloading’ of apps onto the phone:  You can’t copy something onto the internal SD card and ‘install’.  If you try, you get a nice “You can only install apps from the Marketplace” window pop up.  Meaning, I can’t install SL4A  (or if you can, I just went through a lot more steps than needed…).   Talking with my buddies who’s smartphone kung-fu is much more powerful than my own, they told me to look into ‘rooting’ the phone:  Give me ‘root access’ on the phone I just bought (shouldn’t everyone have that?  I must have missed the politics class on that one).  This will allow me to be able to ‘sideload’ apps.

After a lot of websearching, I came across this form post, which describes how to install the “Unleash the Beast” root tool.  It seemed to do everything I needed it to in one step:  Clean off all the bloatware that came with the phone, disable the annoying on\off sound fx, plus a bunch of other stuff.  Most importantly though it gives you root access and enable sideloading.  I followed the directions on the site, and it worked flawlessly.  Not to say it didn’t stress me out during the process :)

Excellent, root complete!

B.  What happened to my USB?

Loooong story short:  When I first got the phone and before the root, my XP laptop wouldn’t detect it.  Went online to the Samsung web site to get drivers:  Site claimed it had drivers, but when I went to the download page:  “This product has no downloads”.  I contacted customer support explaining the issue, and their reply was to do the exact thing I had just done.  Robot.  More websearching:  Based on this post, I got a link to the drivers, and installed:  the  machine could now see my phone.  Win.

After the root, when I connected phone to computer, the computer again failed to detect it.  Tried plugging it into a different machine:  Same result.   The phone came with no directions, and the web page for downloads claiming it had the manual didn’t work (like mentioned above).  More websearching:

  • Settings -> Applications -> USB Settings -> Set to “Ask on connection” (was ‘Kies’).

Now when I plug the phone into the computer, the phone asks me ‘how it should be connected’:  Set to “Mass storage” (not Kies).  Then access the notifications menu (that one that scrolls down from the top), click on the “USB connected” item, and then “Mount”.  Suddenly the computer detects it.  What a pain…

C.  Get Astro File Manager

Part of  executing “Unleash The Beast” was the removal of the built-in “My Files” app.  To install the new tools I’d be getting I needed a new file manager:  Recommended in several places was “Astro File Manager“.  Successfully installed from the marketplace.

D.  Install SL4A with Python:

From the Android Scripting download page, I downloaded both sl4a_r2.apk and python_for_android_r1.apk.  After connecting the phone to computer and jumping through all the USB hoops, I copied them both to the \Android dir (I have no idea if that’s the right place).  Unmounting the the usb drive from the phone’s menu, I then accessed Astro:  Browsed to the /sdcard/Android dir, selected ‘sl4a_r2’ -> Open App Manager -> Install.  I then repeated this process on ‘python_for_android_r1’.  While python was installing, it also downloaded and installed all the other Python .zip files found in the SL4A download page as well.

When it was complete, I had the nice ‘SL4A’ app  ready for usage

Note: In hind-site I found the official doc for “Installing Interpreters” which saves you from having to install the Python shell by hand.  Main problem is the menu for his app on the phone isn’t that intuitive, and I totally missed how to do it the first time around.

Update: A buddy of mine did this, his install was even easier:  On his phone he simply browsed to the SL4A page, and clicked on the bar-code:  It installed automatically.  Magic.

E.  Do something with it:

Launch it ->  Settings Menu -> View -> Interpreters -> Python 2.6.2 ->  the shell opens:

>>> import this

Continue to Part 2
Python talks to the Arduino…

Sort of a followup to my previous post ‘Arduino talks to Processing, Python…‘, I thought I’d try going the other way:  Send commands to the Arduino from Python over the serial port.

My son and I recently soldered together a lolshield (‘lots of LEDs’) for the Arduino.  The ultimate goal for this is to have Python, via Pygame (most likely) run graphics on the lolshield as if it was a mini-flatscreen.  But first I need to get something sent from Python to Arduino, and this was surprisingly hard.

First, the internets came to my aid and I got some sample code allowing the Arduino to read a single character from the serial port, and blink an LED that number of times.  The source was by Tod E. Kurt, and I got it off his  page here.  My modified version is below (modified mainly with docs so I could understand what’s going on…)

// Arduino Code:
// Below, 'character' types are defined:  They hold 1 byte of data, 256 values.
// A char can be interpreted as a small number (0-255) or as a member of the
// ASCII set (which is what we deal with below).  Characters expressed as
// ASCII are surrounded in single-quotes, like '5'.
// Thus each char has a corresponding numeric value can thus be tested against.

int ledPin = 13;   // select the pin for the LED
int val = 0;       // variable to store the data from the serial port

void setup() {
 pinMode(ledPin,OUTPUT);    // declare the LED's pin as output
 Serial.begin(9600);        // connect to the serial port
}

void loop () {
  if (Serial.available()) {
    // For the below examples, let's pretend that the passed-in serial 
    // value is character '5'.
    // Since the declared variable val is an int, it converts the char 
    // value passed in into an int.
    // If char val = '5', the numeric representation is 53.
    val = Serial.read();      // read the serial port

    // If the stored value is a single-digit number, blink the LED 
    // that number of times.
    // Here we compare the int value of val against the int values 
    // of the string.
    // Characters '0' and '9' are equivalent to integer 48 and 57.
    if (val > '0' && val <= '9' ) {
      Serial.println(val);
      // Convert from char to int:
      // From above, int conversion of val, which is char '5', is 53.
      // int conversion of char '0' is 48.
      // 53-48 = 5  : blink that # of times
      val = val - '0';  
      for(int i=0; i<val; i++) {
        Serial.println("blink!");
        digitalWrite(ledPin,HIGH);
        delay(150);
        digitalWrite(ledPin, LOW);
        delay(150);
      }
    }
  }
}

Now for the Python stuff.  On the ‘Arduino: Playground‘ site, I found this example Python code using the pySerial libary:

>>> import serial # if you have not already done so
>>> ser = serial.Serial('/dev/tty.usbserial', 9600)
>>> ser.write('5')

And it works, presuming you’re in the interactive Python shell.  If however you try to make a module out of the same code and execute it, it will fail:  No multi-blinking LED.  After researching several posts of other people that had similar issue (here, here, here, and here) I tracked down the main culprit:  When you make a connection to the serial port via Python, it sends a reset command to the Arduino. If you immediately send your data to the port immediately after, the Arduino won’t be initialized and ready to receive it.  To solve this, we simply pause the module for a bit while the Arduino does its thing:

# simpleSerialSend.py
import sys
import serial
import time
PORT = 'COM4' # The port my Arduino is on, on my WinXP box.

def main(val=5):
    # Open a connection to the serial port.  This will reset the Arduino, and
    # make the LED flash once:
    ser = serial.Serial(PORT)

    # Must given Arduino time to rest.
    # Any time less than this does not seem to work...
    time.sleep(1.5)

    # Now we can start sending data to it:
    written = ser.write(val)
    ser.close()
    print "Bytes Written to port:", written
    print "Value written to port: '%s'"%val

if __name__ == '__main__':
    args = sys.argv
    try:
        main(args[1])
    except IndexError:
        main()

This module can now be ran from the command prompt, and you can optionally pass in (from 0->9) the number of times you want the LED to blink:

c:\pyModules\simpleSerialSend.py 5

When this runs, you’ll see the LED blink once when the reset happens, a 1.5 second pause, and then the LED will blink 5 times.

What’s interesting is I tried this same thing with Processing, and failed, and I presume for the same reason:  The Processing sketch was executing too fast to allow the Arduino time to warm up.  And, there doesn’t seem to be a ‘pauses \ sleep \ wait’ function in Processing.  I tried using java.lang.Thread, but it didn’t seem to pause the sketch until it was done running.  So I need to do some more research there.  Had I got that working, then the title of this blog post would probably be different 😉

Arduino talks to Processing, Python…

Note:  This post has been updated, see notes below.

Been enjoying tinkering around with the Arduino and the Electronic Brick Kit I recently got. It’s easy to send data from the computer to the Arduino and run sketches there, but what about the other way? The Arduino can talk back with the computer over its serial port, so at that point any language that can read the serial port can read the Arduino’s data.  Since I’m most comfortable with Python and Processing, that’s what the below code covers.

Few things to note:

  • Python has no built-in serial modules\packages (to my knowledge), but I found several references to pySerial, that appears to be the go-to source for cross-platform serial info in Python.  So you will need that.
  • Update:  After a bit of thinking, I have got Python working independently from Pygame, see notes below.
    • (Old subject):  I couldn’t get Python working directly:  When I’d run a loop to capture the serial data, it would hang the shell.  I figured this was because it wasn’t ‘advancing in time’ (just looping endlessly on the first item), so I popped the code into Pygame, and it started working flawlessly.  There probably is a way to do this in Python, but this is my first stab at reading any kind of serial data.  So the Python example is implemented via Pygame.
  • This is all authored on  Win2k OS.  Serial ports on different OS’s are handled differently.  For the Python and Processing code I define a variable that sets which com port the Arduino is on (in my case, it’s COM5), which is something that you should have already defined via the Arduino IDE.  Just make sure those values match.  And again, if you’re on Linux of Mac, the serial port values will be different.
  • On both the Processing and (the old)  Python examples, they will draw a window with a circle inside that will change in size based on the passed in serial data. Based on the sensor I was using (twist sensor) on an analog pin, this maps the voltage of the sensor into values 0-1023, which are easy to then map into the on-screen graphics. The code will also print out to the shell\IDE the captured serial values.
  • Finally, I should point out I pulled a lot of info from the book Getting Started with Arduino.

Dependencies:

Begin:

Arduino:

Here is the Arduino code.  I have a rotational sensor on analog pin 5.  But you can use any kind of sensor that you want.  I picked the rotational sensor since it’s easy to see the values change.

/**
serialSensor
Eric Pavey 2009-12-26

Sketch will print the value from the sensor to the serial port
*/

#define SENSOR 5

int val = 0;

void setup(){
  Serial.begin(9600);
}

void loop(){
  val = analogRead(SENSOR);
  // Print to the serial port:
  Serial.println(val);
  delay(100);
}

When that is uploaded to the Arduino you can hit the ‘Serial Monitor’ button in the IDE, which will pop up a new window that shows the values captured from the serial port:  When I twist my rotational sensor, I see the result print in the serial monitor.  Pretty straight-forward.  Be sure to close the serial monitor window before you run any of the below code, or they will be blocked from accessing the serial port.

Processing:

The IDE’s for Processing and Arduino are very similar; the Arduino docs say it was ‘built on’ Processing, and the resembelence is strong.  When executed, will create a window, with a white circle inside thats size is controlled by the sensor data passed through the serial port.

Here is the Processing code:

/**
 * readArduinoSerial
 * Eric Pavey 2009-12-26
 * Read data from the computers serial port, that is being fed
 * by an Arduino sketch.  It's expecting values from 0->1023.
 */

import processing.serial.*;

// Create object from Serial class
Serial myPort;  

// Converted data received from the serial port
float val = 1.0;
float prevVal = 1.0;
int minSerial = 0;
int maxSerial = 1023;
// Define which port the Arduino is on:
String arduino = "COM5";

void setup(){
  smooth();
  frameRate(30);
  size(200, 200);
  myPort = new Serial(this, arduino, 9600);
}

void draw(){
  if ( myPort.available() > 0){
    String portVal = myPort.readString();
    // Trim off any extra chars that have no meaning
    // to our sketch.  If we don't do this, we can get
    // NaN float vals when converted.
    String trimmed = portVal.trim();
    if(trimmed.length() > 0){
      // if we have a valid value, update it:
      val = float(portVal);
    }
  }
  if(val != prevVal){
    println("New val: " + val);
    prevVal = val;
  }

  background(0);
  float mapVal = map(val, minSerial, maxSerial, 1, width);
  fill(255);
  ellipse(width/2, height/2, mapVal, mapVal);
}

Python / Pygame:

Like Processing, when executed, will create a window, with a white circle inside thats size is controlled by the sensor data passed through the serial port.

Here is the Python / Pygame code:

"""
readArduinoSerial.py
Eric Pavey - 2009-12-27

Read data from the computers serial port, that is being fed
by an Arduino sketch.  It's expecting values from 0->1023.
"""

import serial
import pygame
from pygame.locals import *
pygame.init()

WIDTH = 256
HEIGHT = 256
FRAMERATE = 30
# Define which com port the Arduino is on:
ARDUINO = "COM5"

screen = pygame.display.set_mode((WIDTH, HEIGHT))
pygame.display.set_caption("Arduino Serial Com.")
clock = pygame.time.Clock()

ser = serial.Serial(ARDUINO, timeout=1)
floatVal = 1.0
prevVal = 1.0

def main():
    global floatVal
    global prevVal
    cirCol = Color("white")
    looping = True

    while looping:
        clock.tick(FRAMERATE)
        screen.fill(0)

        for event in pygame.event.get():
            if event.type == pygame.QUIT:
                looping = False

        # Read the serial value
        ser.flushInput()
        serialValue = ser.readline().strip()

        # Catch any bad serial data:
        try:
            floatVal = float(serialValue)/8.0
            if floatVal != prevVal:
                # Print the value if it differs from the prevVal:
                print "New Val: ", floatVal
                prevVal = floatVal
        except ValueError:
            pass
        pygame.draw.circle(screen, cirCol, (WIDTH/2, HEIGHT/2), floatVal)

        # update our display:
        pygame.display.update()

if __name__ == "__main__":
    main()

Update: Here is the new Python code sans-Pygame. It will print results directly to the shell it was executed from:

import serial

ARDUINO =  "COM4"

def main():
    ser =  serial.Serial(ARDUINO, timeout=1)
    prevVal = None
    while 1:
        # Read the serial value
        ser.flushInput()
        serialValue = ser.readline().strip()
        # Catch any bad serial data:
        try:
            if serialValue != prevVal:
                # Print the value if it differs from the prevVal:
                print "New Val: ", serialValue
                prevVal = serialValue
        except ValueError:
            pass

if __name__ == '__main__':
    main()

In Conclusion…

So while the implementation in Processing \Python is pretty simple, it opens doors into what could be.  Another interesting observation is that the Processing sketch was really ‘jumpy’:  It seems to capture values that aren’t being reported by the Arduino sketch, causing the circle to ‘jump’ in size occasionally.  However, the Pygame (and updated pure Python) app seems pretty rock solid, and no ‘jumping’ is reported.

Got the Electronic Brick

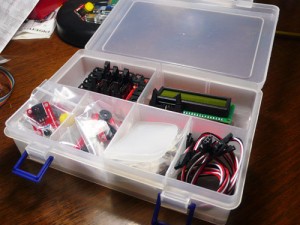
ElectronicBrick01

The Electronic Brick Kit

Recently at the Maker Shed I found the ‘Electronic Brick‘ starter kit for Arduino.

The Electronic Brick kit is made by Seeed Studio, (yes, that’s three e’s) you can find it on their homepage here as well.  Online docs (pdf) are available for it.  In addition to the components in the kit, they sell many others that plug into it.

In a nutshell, it provides a shield for the Arduino, and a bunch of modular plug+play components allowing you to easily prototype simple electronics.  The docs show how to integrate these components with Arduino’s programming language.  Which is based on Wiring (implemented in C/C++), which in turn is very similar to Processing (Java).

I’d been looking for something like this for some time:  I’ve been wanting to make some more interesting things with my Arduino, but trying to by hand solder all the required components takes more time and know-how than I want to currently invest.  Plug+play = good.  And a nice project over the Christmas break :)

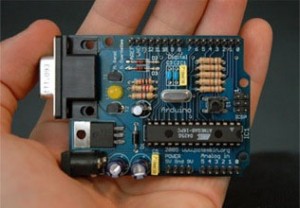
Arduino01

The Arduino!

Two new books added to the library…

Got to make use of some 40% off coupons at Barnes & Nobel today:

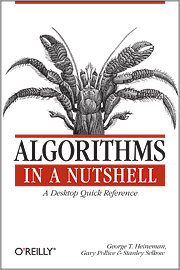
  • Algorithms in a Nutshell : I’d been eying this book for a while now, finally took the plunge.  I’m particularly interested in their chapters about convex hull generation, and path-finding AI.  The problem-solving techniques in general I find quite fascinating.
  • Visualizing Data : By Ben Fry, one of the co-creators of Processing.  I find this interesting not only in the code-examples behind displaying data to the screen, but the processes behind finding and parsing the data in the first place.  Also serves as a good bridge between Processing and Java, with examples of running Processing in Eclipse (see my post here).