Posts Tagged ‘ raspberry pi

Raspberry Salad Part 2: Raspberry FM

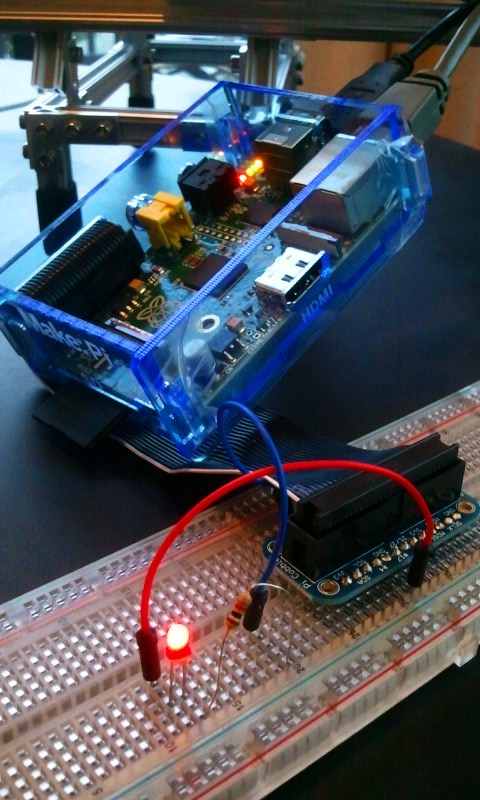
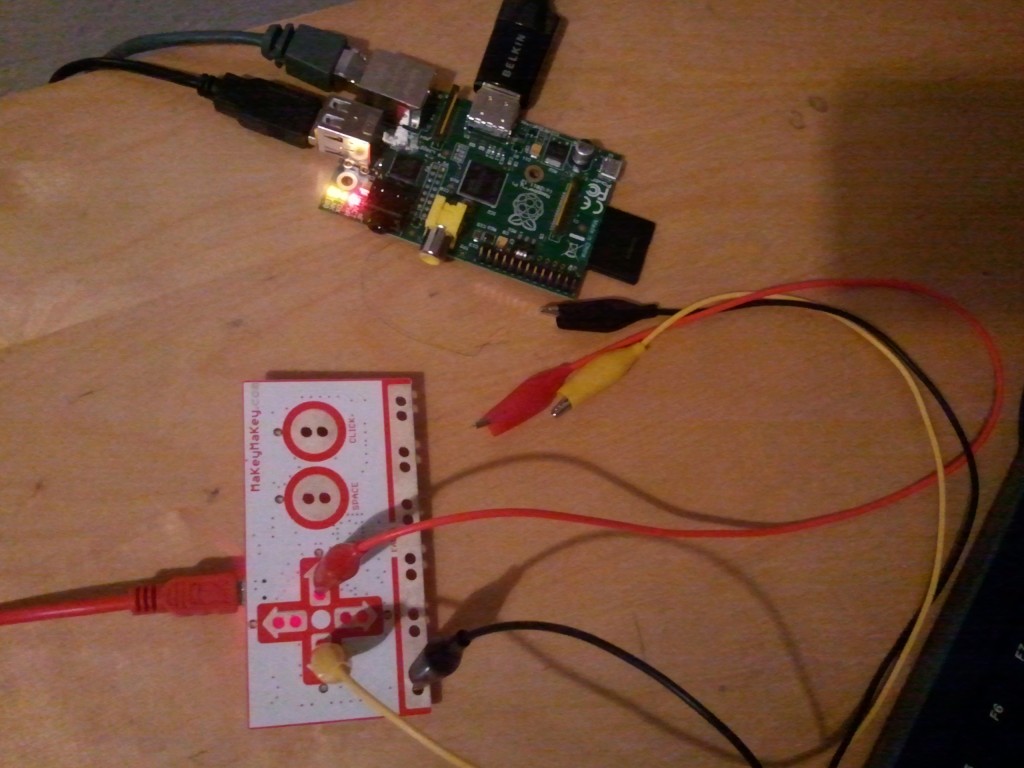
Raspberry FM Tuner: Makey Makey hooked up to Raspberry Pi ready to change stations

Based off my previous post (which explains how to instal MPayer), I wanted to find a way to create a Raspberry Pi project combining my Makey Makey:  I figured the Makey Makey would work well as a ‘station changer’ for streaming internet radio.  I tried, for quite a while, very unsuccessfully, to get this working via a Python program wrapping PyGame’s keyboard detection:  It would lock up after the first station change.  This was all done via Adafruit’s ‘Raspberry Pi WebIDE‘, connecting in to the Pi over SSH.  I learned one very important thing from authoring code that way:

When logged into the Pi over SSH, either from the WebIDE or a PC, the Pi won’t detect the Makey Makey.

I thought I had a defective Makey Makey, until I realized it worked fine when plugged into my Mac.  Programming the Pi via the Mac over SSH had been working so well, I’d pretty much forgotten about connecting it to my TV over HDMI and working with it directly (via a USB keyboard).  Once I did that, the Makey Makey immediately started working, both in the shell, and the gui.

Once I knew the Makey Makey was functional, these were the steps I went through to turn the whole thing into an “internet radio tuner”.

Makey Makey Configuration:

  • Black alligator clip on ground, yellow on “Left Arrow”, red on “Right Arrow”.  White alligator clip on the “Up Arrow”, gray alligator clip on the “Down Arrow” (not shown in the above image).
  • Connected to the Raspberry Pi, over a powered USB hub.

Raspberry Pi Configuration:

  • Audio out connected to a stereo system (headphone jack, or in my case to tv over HDMI)
  • Connected to internet (CAT5 \ WiFi)
  • USB Keyboard hooked up (over powered USB hub) to issue commands below.  Remember, the Makey Makey won’t function when connected to over SSH.
  • In my case, video connected over HDMI so I could hook it up to my TV, to issue commands.

MPlayer Playlist Creation:

You can create playlist files for MPlayer, which can be made up of internet radio station streams.  This allows you to use the keyboard (or in our case, the Makey Makey) to advance and go back though them.  It’s a simple text file, with each line being a different item to play.  I decided to make a directory under home called /mplayer to store the playlist:

cd ~
mkdir mplayer
cd mplayer
nano somafm.pls

And inside that file (not sure why it’s showing up as double-spaced, it shouldn’t be), I added some of my favorite stations from SomaFM:

http://ice.somafm.com/groovesalad
http://ice.somafm.com/lush
http://ice.somafm.com/beatblender
http://ice.somafm.com/dronezone

You can of course enter any type of streaming data MPlayer supports.  But those are the stations I recommend 😉

Re-Configure MPlayer’s Key Bindings

By default MPlayer uses the ‘less than’ & ‘greater than’ keys < > to switch to the previous\next items in a playlist, and ‘9’ and ‘0’ to decrease/increase volume.  Those aren’t exposed on the Makey Makey by default, so we want to override that with the Left / Right arrow keys instead to control the playlist selection and Up/Down arrow keys to control the volume.  To do so, we need to create a ‘configuration file’ in the ~/.mplayer dir.  By default, I didn’t have one, so I created a new one:

cd ~/.mplayer
nano input.conf

And inside that file:

RIGHT pt_step 1
LEFT pt_step -1
UP volume 5
DOWN volume -5

Launch The Radio

Everything should be ready to go: Get back to the mplayer dir with the playlist, and launch MPlayer:

cd ~/mplayer
mplayer -playlist somafm.pls

At this point, music should start streaming in.  If you press the “Right Arrow” on the Makey Makey, it should advance to the next item in the playlist, until you hit the end.  The “Left Arrow” will go back through the previous playlists.  Pressing Up/Down Arrows should increase/decrease the volume in steps of 5.

MPlayer resource links:

I had a really hard time tracking down MPlayer command-line info:  Here’s docs/solutions on how to find pertinent info:

What’s next?

  • Figure out how to launch this automatically on Pi startup.  If I don’t have a keyboard and TV laying around, how can this just ‘turn on’ by itself?
  • Make a nice enclosure for the whole thing.
  • Make some sort of cool interface for the Makey Makey.  Fruit is the first choice…. but I’m trying to think of something more permanent.

Go to Part 1: Raspberry Salad…  |  Raspberry Salad Part 3: Auto-run program on startup
Raspberry Salad…

…or Groovy Pi.
One of my favorite internet radio stations is soma fm, and in particular, their Groove Salad station.  I figured what better to do than to turn my Raspberry Pi into a Groove Salad music streamer.

After searching the internets, I came upon MPlayer, which you can execute via the command-line.  To install on the Pi:

$ sudo apt-get install mplayer

Then to start streaming Groove Salad via it’s playlist:

$ mplayer http://streamer-dtc-aa01.somafm.com:80/stream/1018

I got the address info by downloading the pls file from soma fm, opening it in a text-editor and extracting that line.

Plug in some headphones (or better yet, hook it to your stereo), and you’re good to go!

Go to Raspberry Salad Part 2: Raspberry FM

Raspberry Pi WebIDE & making things blink

On the Raspberry Pi, just like on the Arduino, the first thing you learn how to do is make an LED blink.  The Raspberry Pi Users Guide walks you through this process, but this was one of the few areas (so far) with the Pi that I ran into trouble, namely over proper access to the GPIO pins, the Pi Cobbler‘s ribbon-header orientation, and how to physically code on the Pi itself.

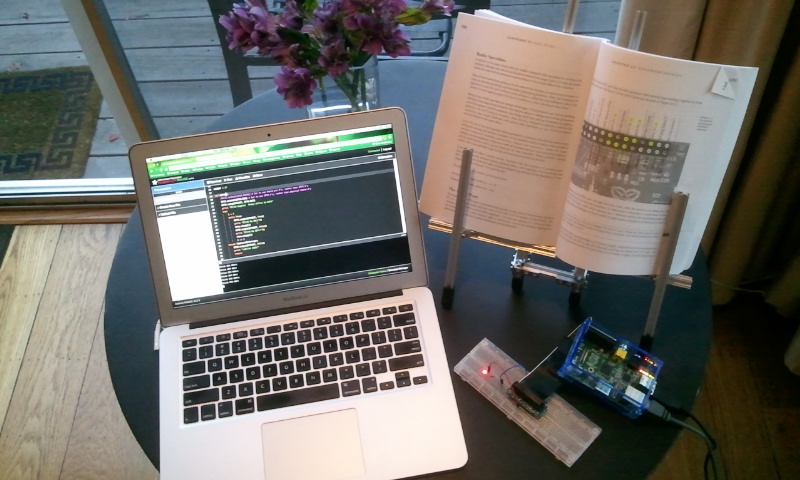
Look at that LED blink!

GPIO Pin issues

There appears to be two different ways to access the pins via the RPi.GPIO Python library: Via the ‘board pin numbers’ (1->32), or via the ‘GPIO numbers’, which many sites (like this one) refer to.  In addition, hardware expansions like Adafruit’s Pi Cobbler (which I’m using) base their silk-screens on the ‘GPIO numbers’.  Long story short, you simply need to tell your code ahead of time which method you’re using:
To use the physical board numbers:

import RPi.GPIO as GPIO
# Set to use physical board pin nums, rather than GPIO nums:
GPIO.setmode(GPIO.BOARD)

To use the ‘GPIO’ numbers:

import RPi.GPIO as GPIO
# Set to use GPIO nums, rather than physical board nums:
GPIO.setmode(GPIO.BCM)

Pi Cobbler Issues

I got the Pi Cobbler via the Maker Shed’s “Raspberry Pi Starter Kit“.  The kit comes with a lot of good stuff to get your started (including the LED that’s blinking next to me).  The Cobbler cable has a header on each end (one plugs into the Pi, one into the Cobbler itself), and each header has a notch on the side to help you understand how to orient it.  At first glance, it looks like the headers are interchangeable… meaning, you could plug either one into the Pi, or the Cobbler.  Very long story short, that’s not true:  To get the side of the cable with the stripe to line up properly with the GPIO pins on the Pi… only one side will work.  I was convinced I had a defective cable that required me to plug it in backwards.  But two days later I realized if I simply flipped the whole cable around everything ‘just worked’.  The Cobbler documentation stresses you insert the cable with the side with the stripe to the left side of the Pi,… but since I thought mine was screwed up…. chaos ensued.  Funny that I didn’t figure this out until I finished this blog post.  The above pic in fact shows the ‘flipped’ insertion in the Pi before I corrected it.

Coding Issues

The final issue I hit was how to actually code Python on the Pi:  I use Wing IDE Professional, and have grown very used to it… but they have no Linux ARM distribution (that I’m aware of).  Going back to IDLE is painful… and I’ve never been a VIM user.  Based on a previous post I can SSH and VNC into the Pi from my Mac, allowing me to code on the mac and copy\paste over to the Pi for execution… but this is still pretty clunky.  After researching for a while I realized, why don’t I try Adafruit’s Raspberry Pi WebIDE?  Installation was easy based on their tutorial, and I was up and running in no time.

Here is my code to make the LED blink, running in the WebIDE\Pi as I type…

#!/user/bin/env python
"""
gpiooutput.py
Modified from pg 195 of "Raspberry Pi Users Guide"

Make a LED flash on\off.
Hardware Setup:
* LED+ lead hooked to GPIO 17 (board pin 11)
* LED- lead connected to resistor.
* Resistor connected to ground (board pin 6)
"""
import time
import RPi.GPIO as GPIO

# This is the GPIO number.  The actual board pin is number 11.
PINOUT = 17

def main():
    GPIO.setmode(GPIO.BCM) # Set to use GPIO nums, rather than physical board nums
    GPIO.setup(PINOUT, GPIO.OUT)
    print "Blink begins!  Press ctrl+c to exit"
    try:
        i = 1
        while True:
            GPIO.output(PINOUT, True)
            print "Blink %s ON!!"%i
            time.sleep(2)
            GPIO.output(PINOUT, False)
            print "Blink %s OFF!!"%i
            time.sleep(2)
            i += 1
    except KeyboardInterrupt:
        GPIO.output(PINOUT, False)
        print "\nBlink DONE!"
        return

if __name__ == "__main__":
    main()

The WebIDE doesn’t have any fancy features yet (that I’m aware of) like debugging & code-completion, but it is alpha software, so hopefully it will become more robust as time goes on.  On the plus side, it will auto-connect to the Pi over the network (no need for SSH), gives you a built-in terminal for the Pi, and stores all the code  in the cloud via Bitbucket (if you’re into that sort of thing).

And thus, the fruits of my labor:

Raspberry Pi + Pi Cobbler + WebIDE = blinky LED


B-day & xmas loot

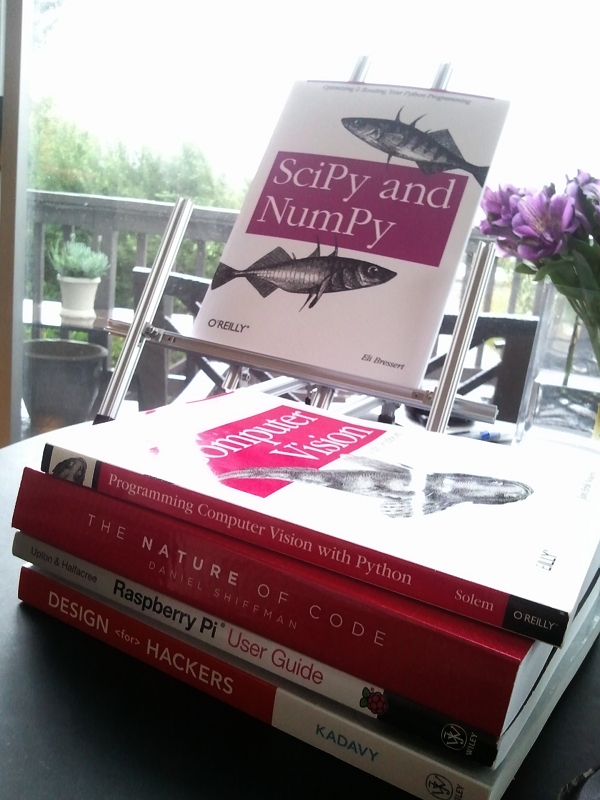
Scored quite a few cool books this year for the birthday\Christmas season:

Books include:

In addition to the books, I got a Microrax starter set, which I built the above book-holder with.

Time to start reading!

Connecting the Mac to the Pi

The main hurdle I’ve had with the Raspberry Pi is simply seeing the screen:  Since I don’t have  a spare monitor laying around, it’s plugged in over HDMI to my livingroom TV.  Sitting on my couch,… the text is really small.

Thanks to the awesome people at Adafruit Learning Systems, they’ve provided two tutorials specifically for logging into your Pi remotely over SSH (Secure SHell), and remote-controlling the desktop via VNC (Virtual Network Computing).  This gives you the advantage of not needing a spare monitor, keyboard & mouse to control the Pi:  You can use your current PC’s setup.

I don’t know anything about Linux or sysadmin work, but their tutorials worked exactly as shown and I was connected in no time.  I’m posting this mainly as a reminder to myself how I got all this stuff hooked up…

  • First, you need to get a SSH connection from your computer (in my case, Macbook Air) to the Pi:  Adafruit’s Raspberry Pi Lesson 6: Using SSH shows you how.  Once this is setup, you can easily remotely login from a Terminal on your PC, and take control of the Pi.  But you don’t have access to it’s gui system, only the command-line.
  • Second, to control the Pi’s gui, you need to install a VNC server on the Pi, and a client on your PC (Adafruit recomends RealVNC’s ‘VNC Viewer’).  Their tutorial covers all of this: Adafruit’s Raspberry Pi Lesson 7: Remote Control with VNC.

Once all that software is installed\setup\configured, how do you make the connection?

  • Boot the Pi, wait for it to ‘be ready’.
  • Open a terminal on your PC:  SSH into the pi (put in appropriate ifnet address of the Pi and login name):
    • ssh 192.168.2.97 -l myPiLogin
  • The terminal is now controlling the Pi.
  • Next, start the VNC server on the Pi:
    • vncserver :1
  • Now that you have a SSH connection to the Pi, and the VNC server running on the Pi, you can connect via VNC Viewer on your PC:
  • Open the VNC Viewer app, and connect to the pre-configured server you made earlier:   For example, 192.168.2.97:1
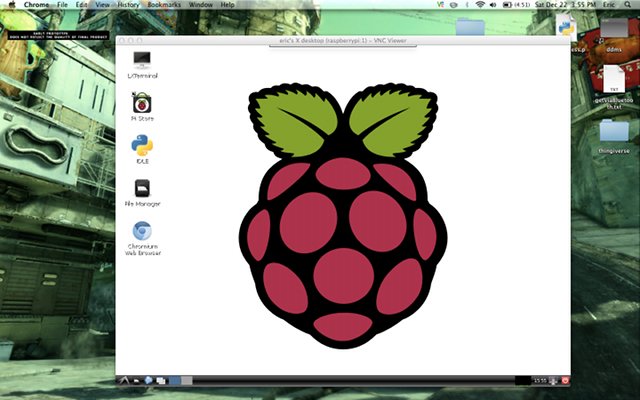
  • After entering in the password, the Pi’s desktop should spring to existence on your PC.
If you forget the address of your Pi, you can run ifconfig from the pi itself (which of couse means hooking it back up to a monitor\keyboard) to get it.
Programming Python on the Pi will be so much easier now…

Pi's desktop on my Mac's desktop: Success!